I found a really cute birdhouse at the thrift store, BUT… it had been painted with some puff paint. Someone had taken the puff paint and basically painted on a flower, multiple flower petals around each birdhouse opening. It was interesting. A lot of times on these homemade birdhouses, they use a license plate for the roof, but this one had a very thin, flexible piece of metal.
I guess I shouldn’t say I found a really cute birdhouse at the thrift store, but I saw the potential of a really cute birdhouse at the thrift store. Now, my to do list is SO long, that I really try not to give myself any projects. And yes, going to a thrift store can make this a really difficult rule to follow, BUT… Whenever I see something with potential, I stop and ask myself. How long will it be before I get to this project. What else would I need to buy to finish this project and will this sell for more than I have into the project. Basically, is it going to be worth my time and effort.
And yes, I literally think about those things every time I’m at the thrift store. Sometimes I bring things home and sometimes I don’t. Sometimes I bring it home and tackle the project right away and sometimes, it sits for a year and every time I walk by it, I think to myself how I broke my rule!
I doubt I’m the only one with things sitting around for years!
Click on the button below to WATCH me create this birdhouse
Tools and Materials
To create this birdhouse you’ll need:


Steps to the Upgraded Birdhouse
Get rid of the puff paint
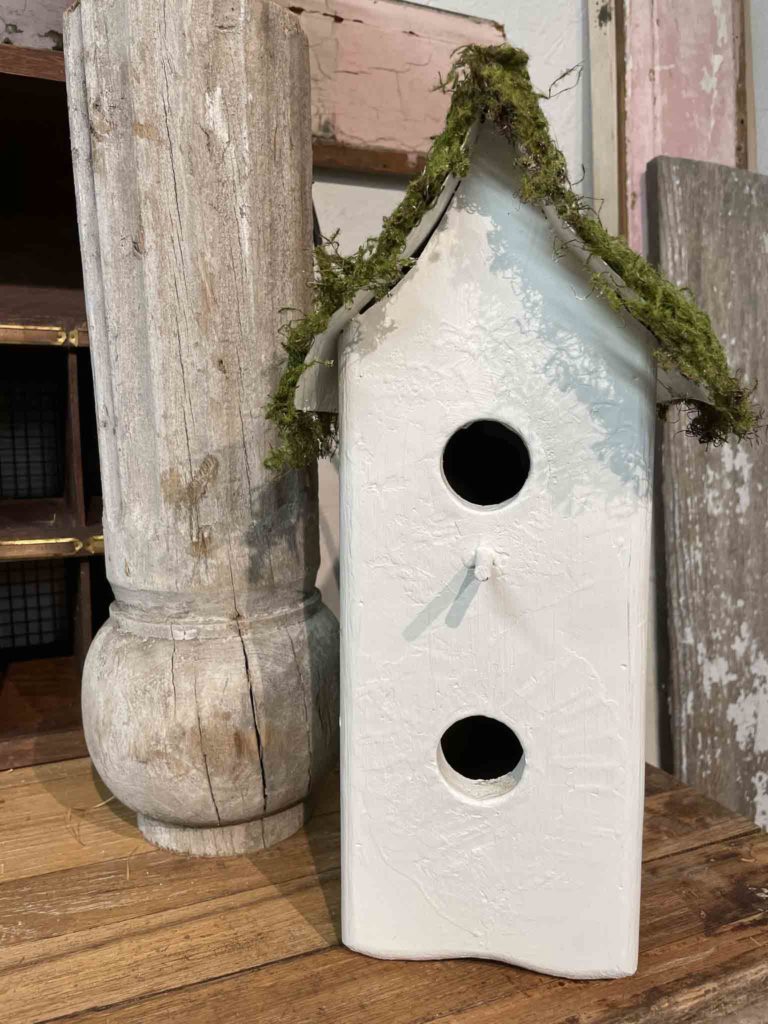
When I bought the birdhouse I honestly thought I’d be able to peel off the puff paint. But of course I couldn’t. I knew that simply painting it would leave the puff paint floral design and I did not want that. So I decided to smooth over the texture of the puff paint on the front by adding wood filler.
I like to use what I have on hand and I had this tinted wood filler that turned neutral when dry. I think I had used it for some other DIY projects and might have even used it on my drywall to fill in some nail holes! So, I grabbed that and a putty knife and added a thin layer. I let that dry and added another thin layer, followed by some hand sanding. Now, I definitely prefer to use an electric sander like THIS. But, you can also do this by hand.
You can see in the pictures that I did not get this super smooth. Part of it is the lighting and part of it is I just didn’t add enough filler nor sand it smooth as much as it needed.
Cover the thin metal roof
Then, I used some sheets of moss to cover the tin roof. I debated popping the tin that was on it off and using a license plate. The rustier the better in my opinion, HERE are a few options. I also thought about using some scrap ceiling tin. I’ve used ceiling tin in a few projects, like these hearts and this tree.
But, in the end I went with the moss. It was another thing that I had on hand and I thought it would look great with the white birdhouse. I actually picture this sitting inside in someone’s spring vignette, versus outside for the birds!
To attach the moss, I simply hot glued it on and then trimmed the extra. I did want a little to over hang, but not a lot.
Add a perch
At the point it was looking better, but I knew there was even more potential. One of the bird perch’s was missing, so after brainstorming how I could attach another small dowel rod to the bottom birdhouse opening only to come up with nothing, I decided to go a different route!
So, I broke off the little dowel rod and replaced them with spoons. Now, of course this didn’t work as slick as I thought it would! I thought I could take my little drill bit and make a hole in the spoon handle. Then, I could get a little screw from my stash and attach it to the birdhouse. When I say little stash, I mean that I save a lot of old screws I take out of things and then throw them into a bucket. That way with a little digging I can normally find the right size and color to match some old piece I’m fixing or DIYing.
But guess what, my drill bit wouldn’t even put a dent in that spoon handle! What I should have done was gone to my carpenter neighbor friend! I talk about him more in THIS post. But, I didn’t do that. Instead I went ahead and bent the spoons with the assistance of pliers and a vice like THIS.
Since I couldn’t screw them to the birdhouse I decided I would glue them. My new favorite glue is E600 glue, so that’s what I used. I’m sure it looked pretty funny in the shop because I had things holding and weighing down the spoons, so they could stay in position while the glue dried!
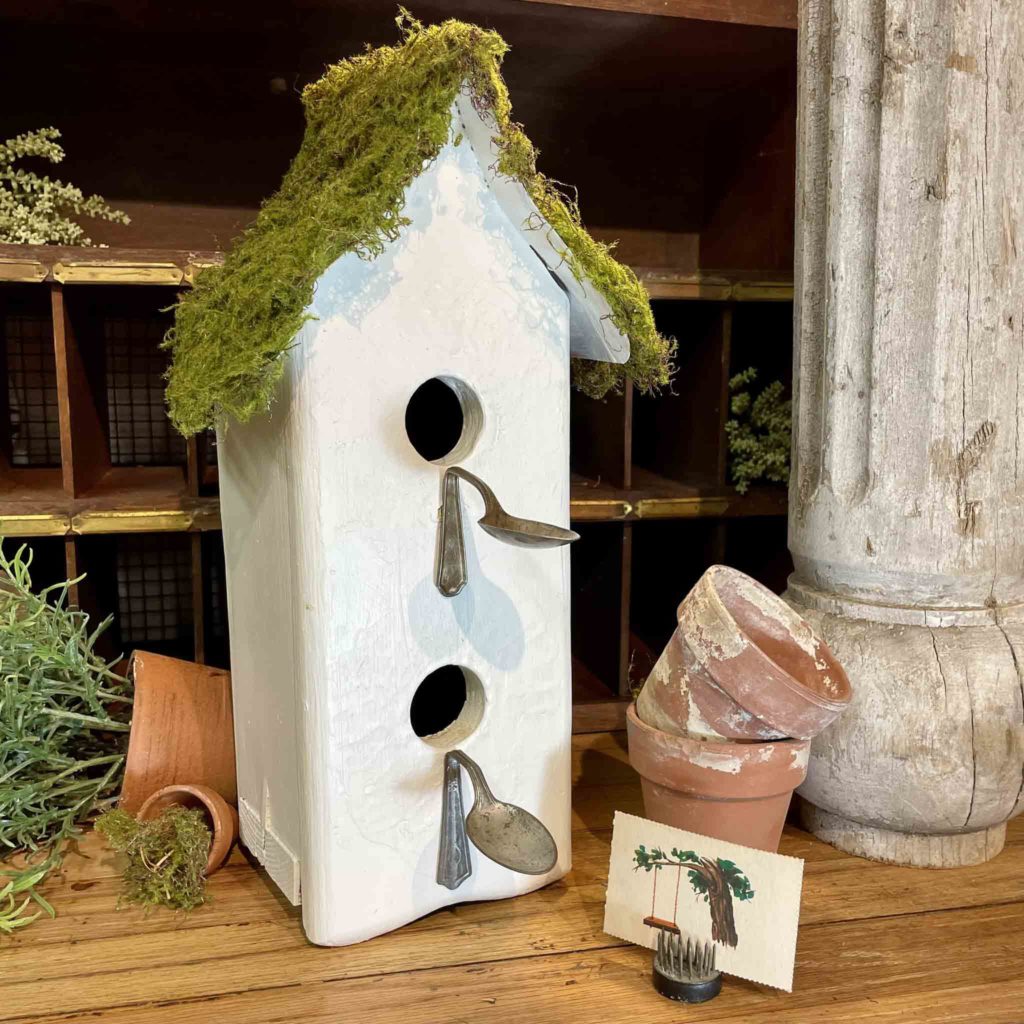
Here is the finished product!
The end result looks amazing, definitely unique and I think it would look great inside or outside! So, remember when you are out junking or thrifting to think about the potential of a piece. With a little man power and personalization you can make anything look good! Just don’t get yourself too many projects!
Show me your birdhouse by tagging me on Instagram @TheJunkParlor.
Disclaimer: This post includes affiliate links.

