I had the PERFECT antique brass lamps, but I didn’t have lamp shades to go with them. Turns out getting shades that were the CORRECT size would cost hundreds! Ummm… no thank you! DIY lamp makeover to the rescue!
I definitely did not have almost $300 sat aside for lamp shades for these antique brass lamps I picked up on a pick! But I ABSOLUTELY loved them and wanted to use them in my home. Trust me when I say, I spent a couple weeks debating on spending that much!
So it all started with the big move. You can read all about moving HERE. Pretty much I sold everything from my antique shop and everything we had furnished the old house with. I honestly kept very little for the new house for multiple reasons.
One reason is that I did not want to have to physically move it! Secondly, we were downsizing so I didn’t have as much room anyway. And third, the house style, floor plan, so many things in the new house were different than in the old house and that meant that I needed different pieces.
How We Use The Space
Needless to say the new house started out pretty bare. I like to live in a space awhile before decorating. Observing how you actually use a space can influence design decisions. For example our family of 5 uses the main floor differently than the older couple that lived here before us. They had 2 stools at the kitchen island. I put 3 stools. You can see what we picked HERE.
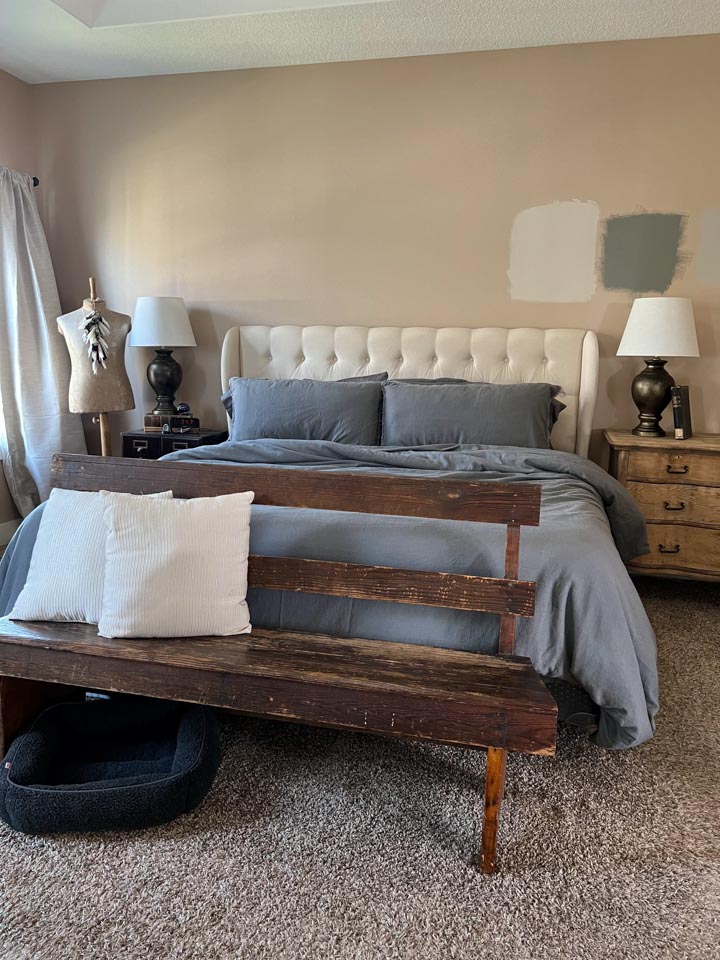
We have kids in both front bedrooms, so there is constant traffic from the bedrooms to the main part of the house. The previous owners didn’t seem to use the rooms as much as us. This influenced the placement of our living room furniture. We needed a larger walkway from the bedrooms which forced the couches in the living room to be pushed closer to the fireplace. This gives us a cozy living space and a nice walkway for the boys to get from their bedrooms to the living area.

Using The Lamps
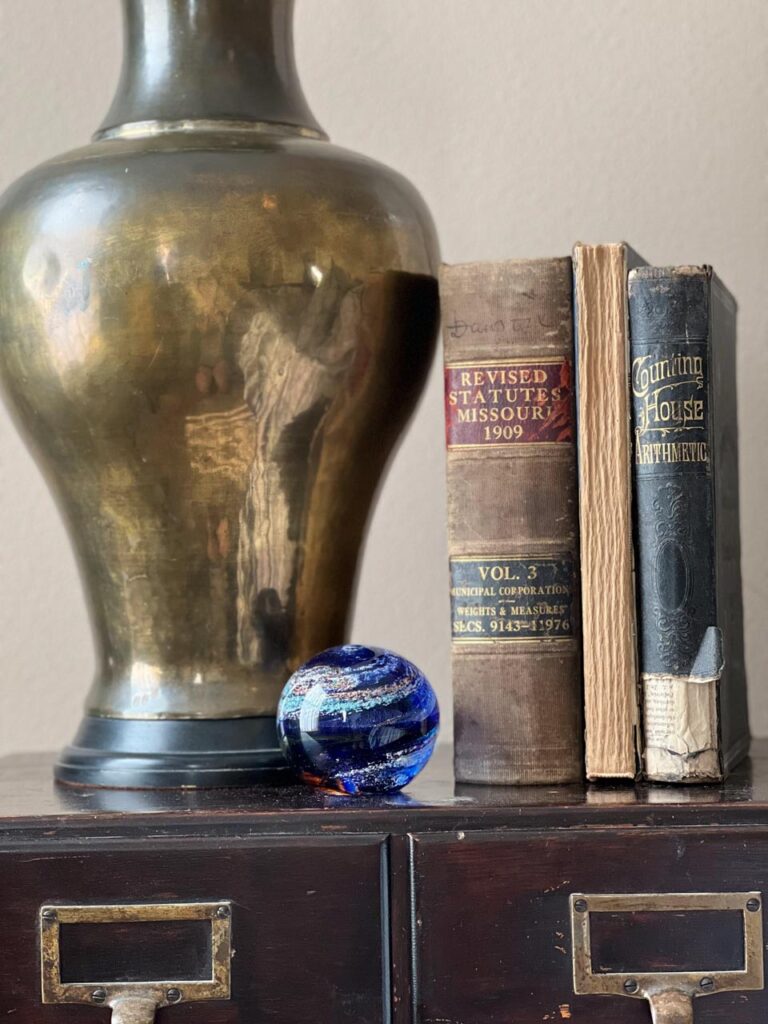
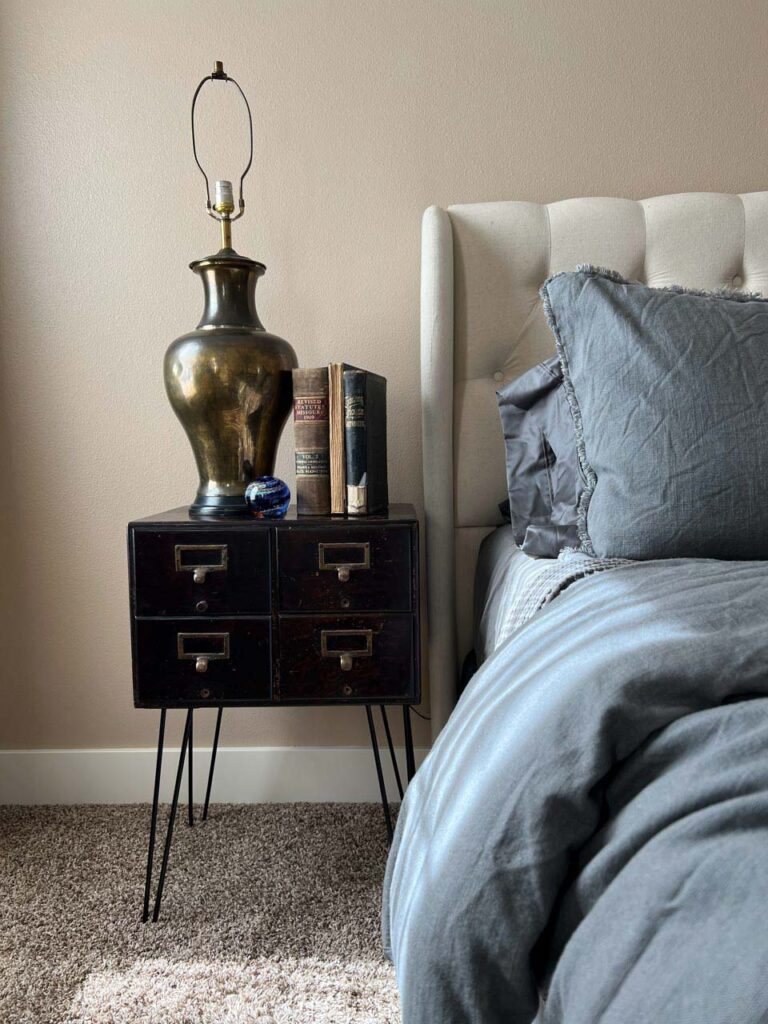
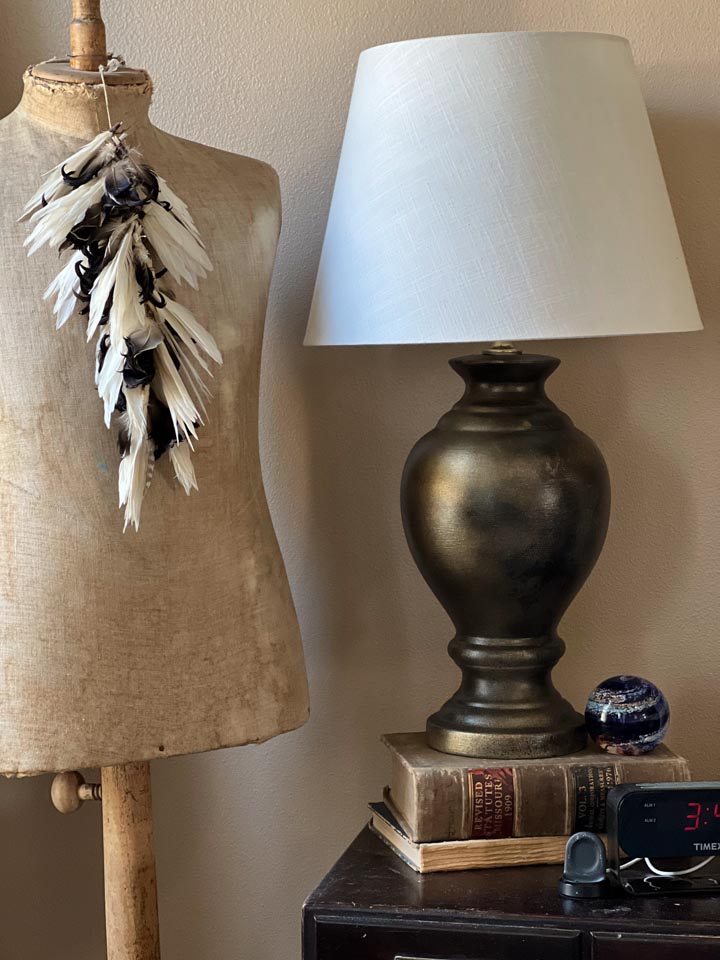
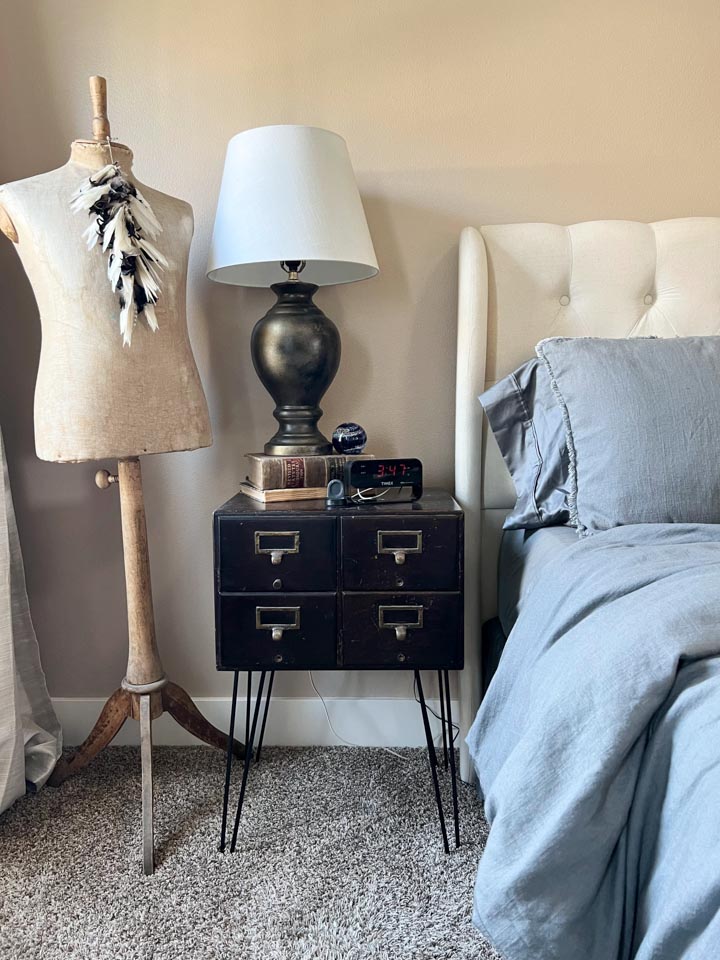
But, getting back to these lamps! I did move them to the new house and I did want to use them. Our master bedroom is pretty dark. For some reason they didn’t install can lights in this room, so the only light comes from the ceiling fan and windows.
As we made and refinished furniture for the bedroom I now had a place to set the lamps. Since I had a place to set the lamps I needed to purchase lamp shades!
I started with Google. I searched something like “picking a lamp shade.” Numerous articles pulled up and every formula came up with the same answer. I needed a lamp shade 20” diameter and 13” tall.
How Do You Pick The Right Size Lamp Shade
Formula #1
The shade should be twice as wide as the lamp base, and one third of the total height of the lamp. So for a 6-inch lamp base, the shade should be at least 12 inches wide. And if the total height of the lamp (including the bulb and harp) is 24 inches, the shade should be 8 inches tall.
Formula #2
Your shade should be about two-thirds the height of your lamp base (give or take an inch). This site also has some great graphics
Formula #3
The width of the lampshade should be equal to the height of the lamp base.
–Oka
Finding a Lamp Shade
Next up I used Google again. This time I wanted to find the 20” by 13” shade I needed. I found a couple and the CHEAPEST was $135!! WHAT!
So I went to some local stores and no one had anything remotely as big as I needed. I came home and searched their websites. Most of the stores had them online that large, but for the same price or more than the ones I had already found!
Holy buckets was I surprised by the price! I started looking at thrift stores and consignment shops. I knew this could take years, and lets me honest, I’m not that patient. I thought it was realistic for me to find one shade, but two shades that matched? I didn’t think that was very likely. And, yes I was looking at lamps with shades and single lamp shades.
I went back to Google and this time just searched for lamps. Basically I could spend less on two lamps, with shades than I could on shades only for my vintage lamps!
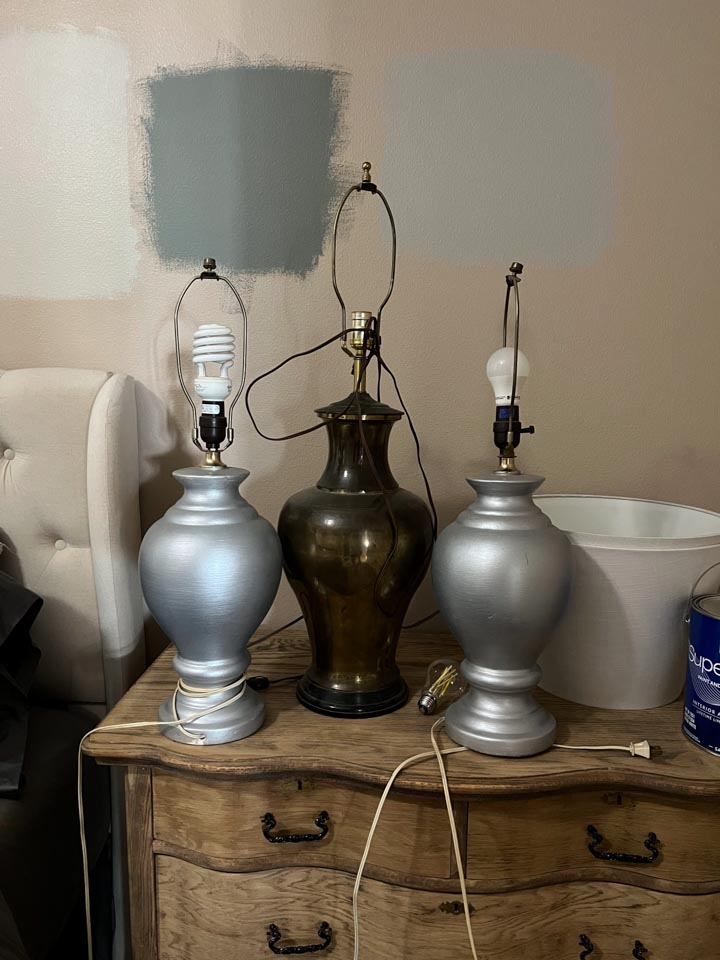
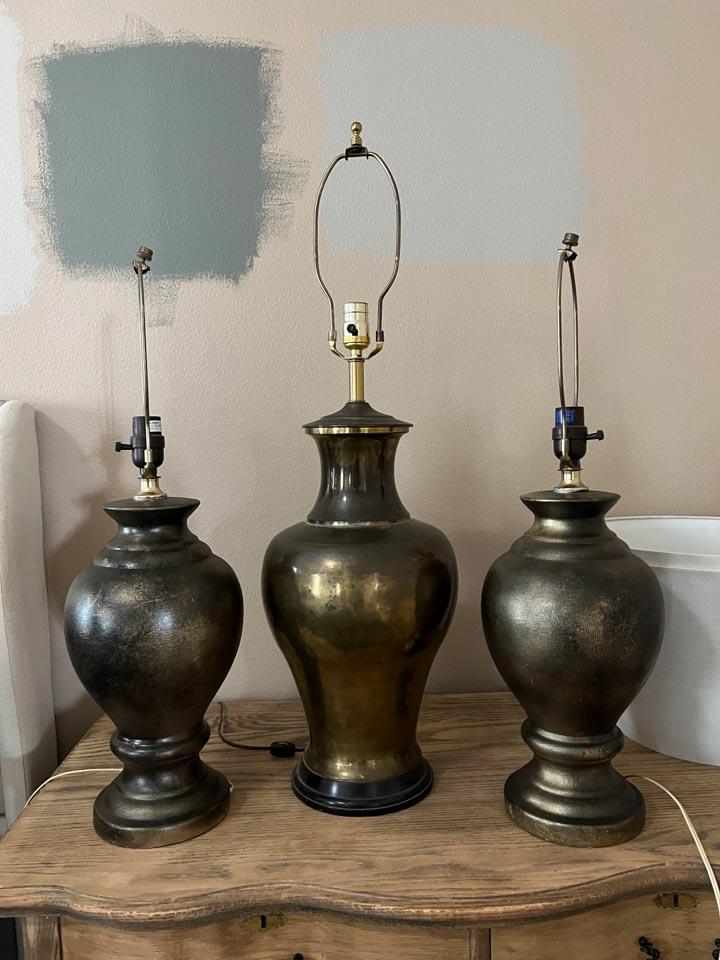
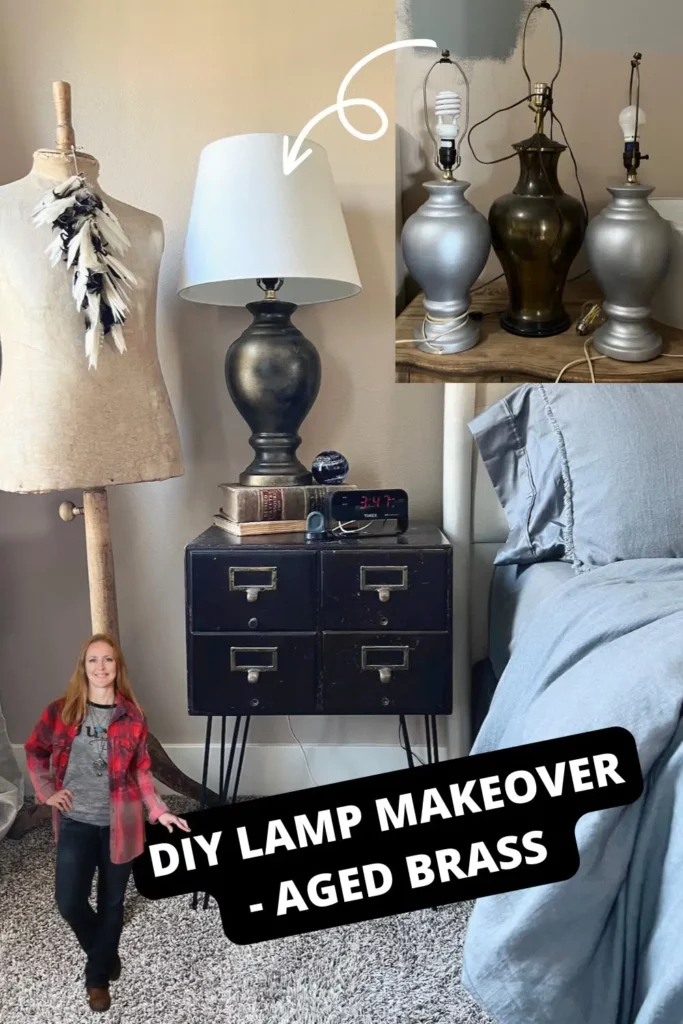
That led me to Facebook Marketplace. I quickly found a pair of lamps for $10. They had a similar shape, but were much smaller, to my vintage brass lamps. I moved my vintage lamps to the basement with the rest of my inventory and decided to make my new lamps look like them!
DIY Lamp Makeover Process
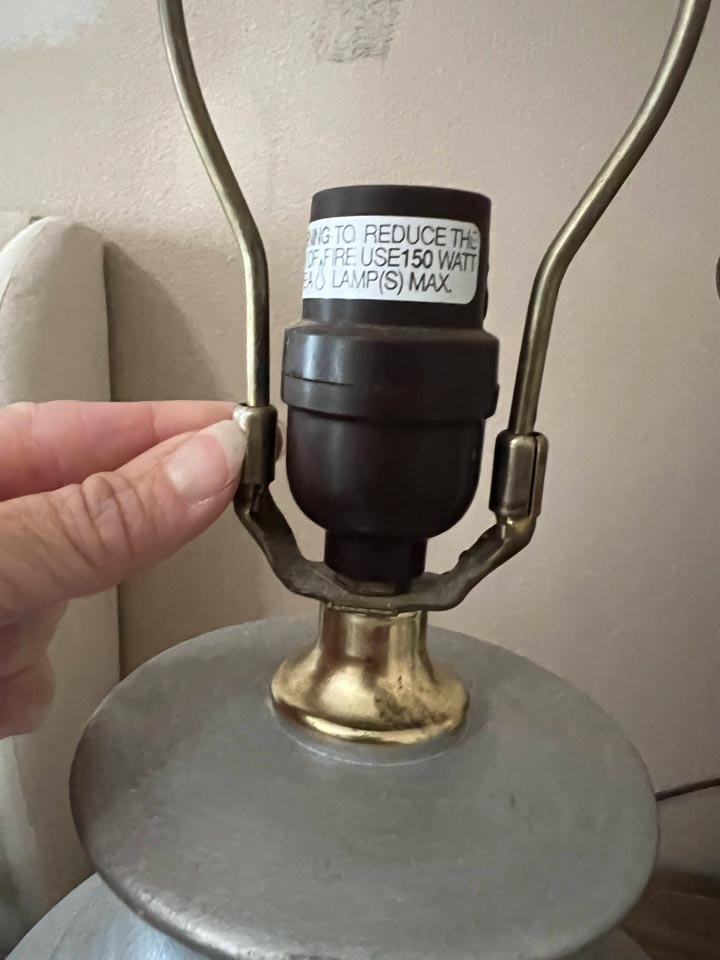
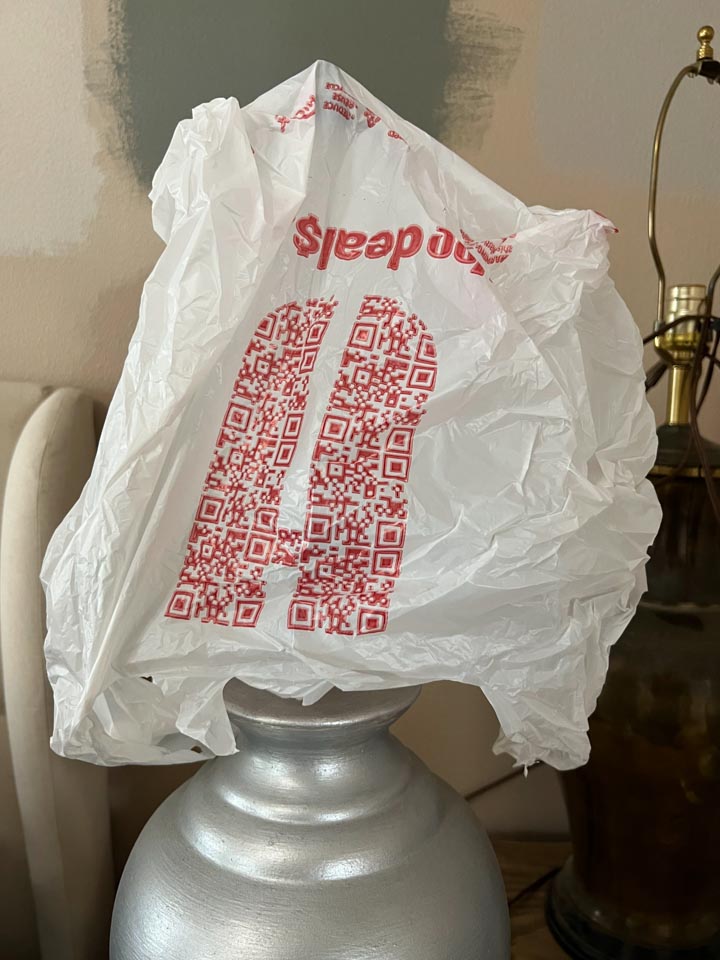
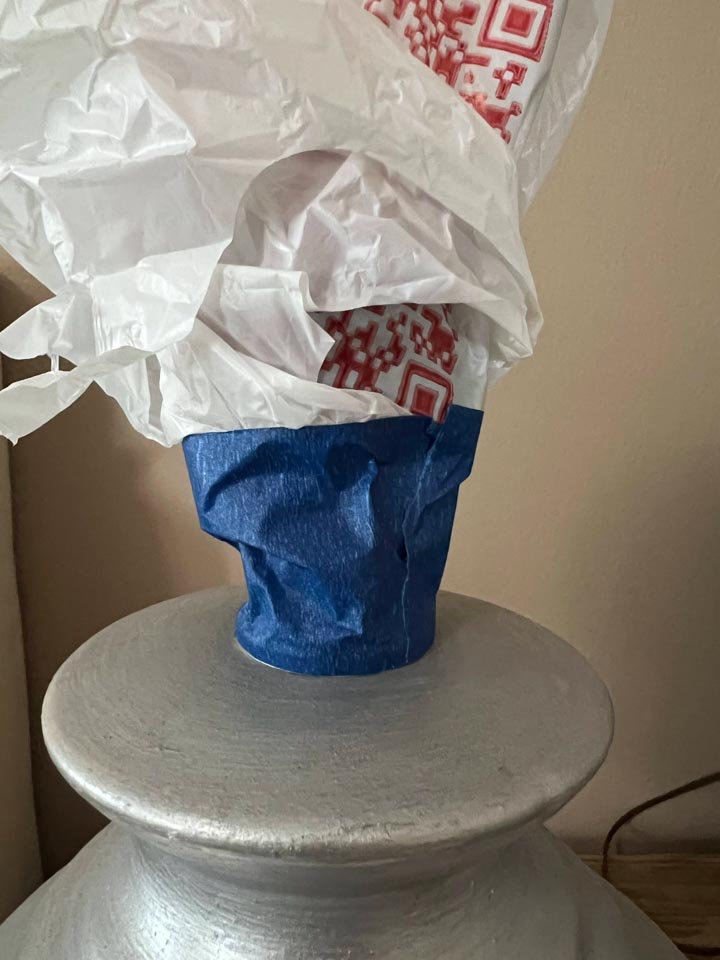
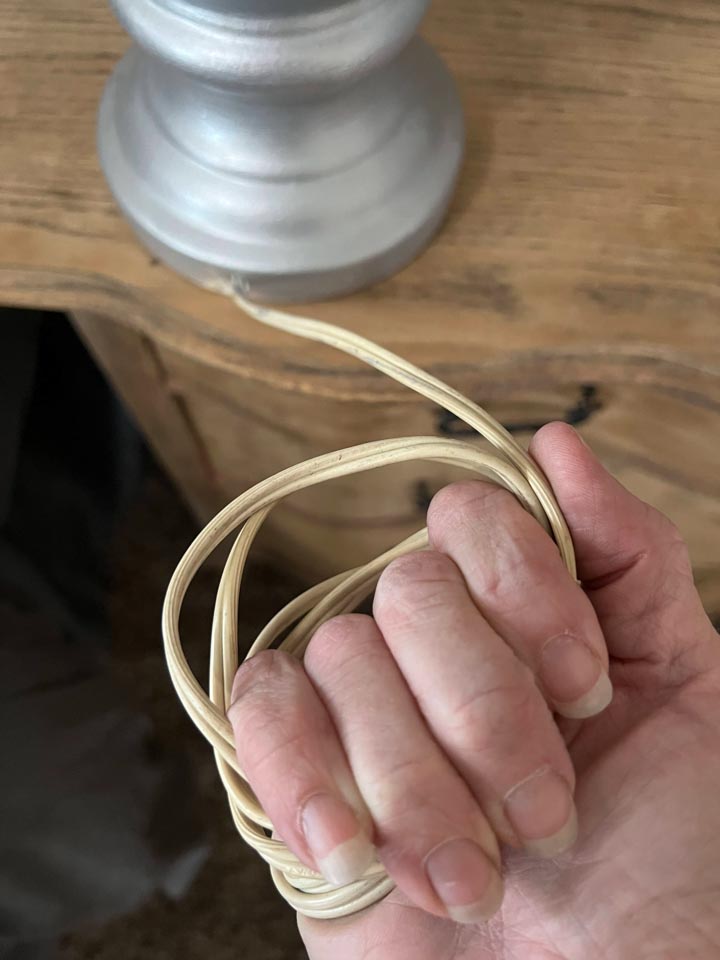
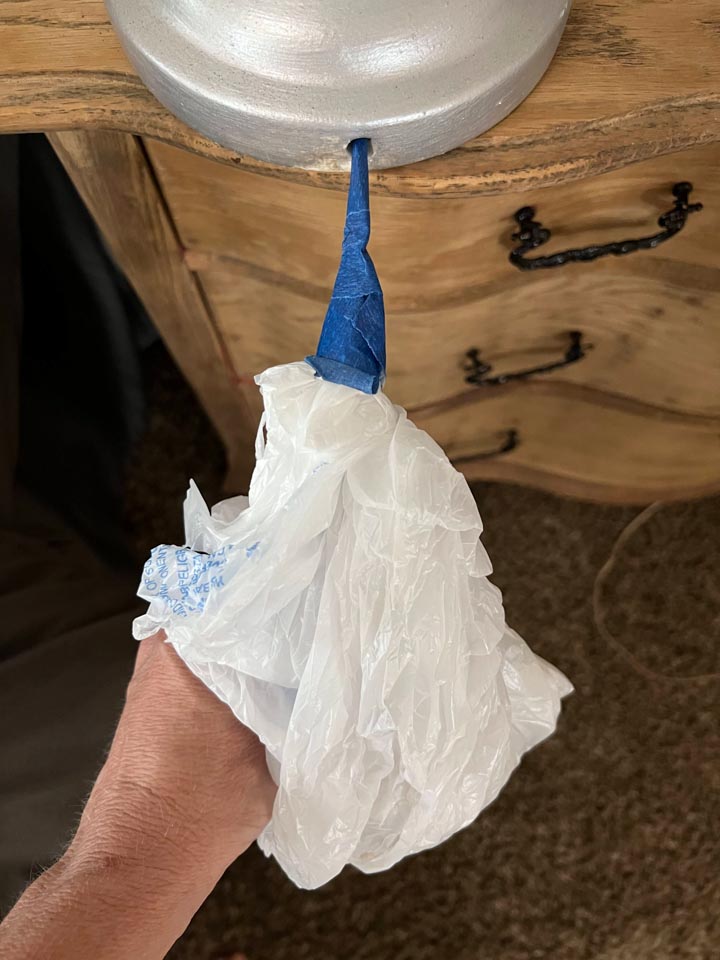
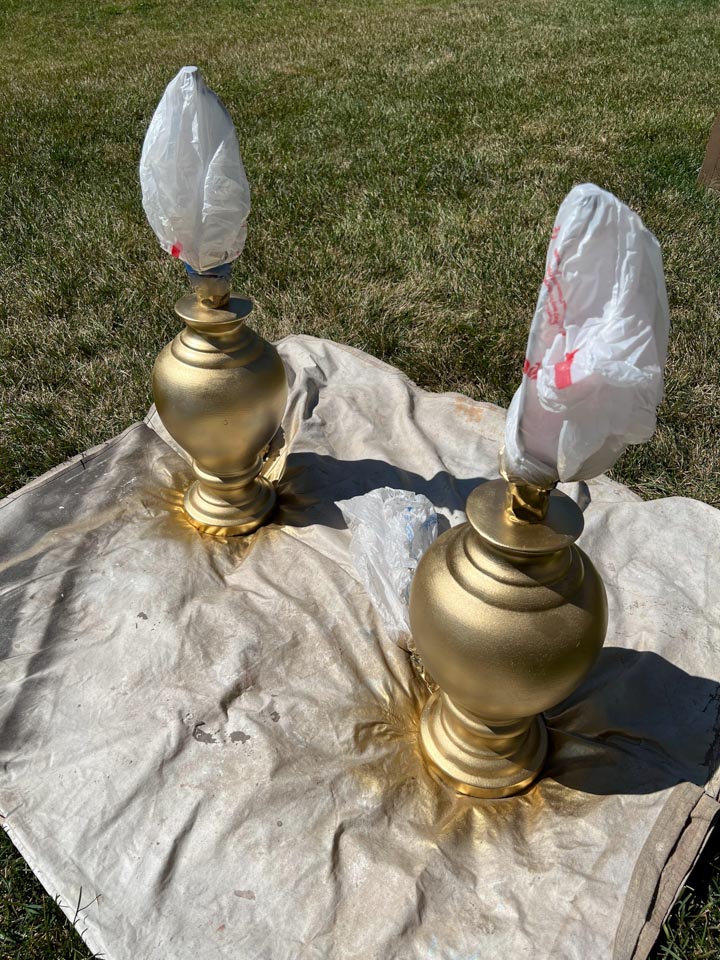
I tried to take the lamp harp off, but I could not get it off. The piece that should slide up so you can pinch the harp and unclip it, would not slide up on either side. Instead I just went ahead and covered everything with painters tape and used Hy-Vee plastic bags.
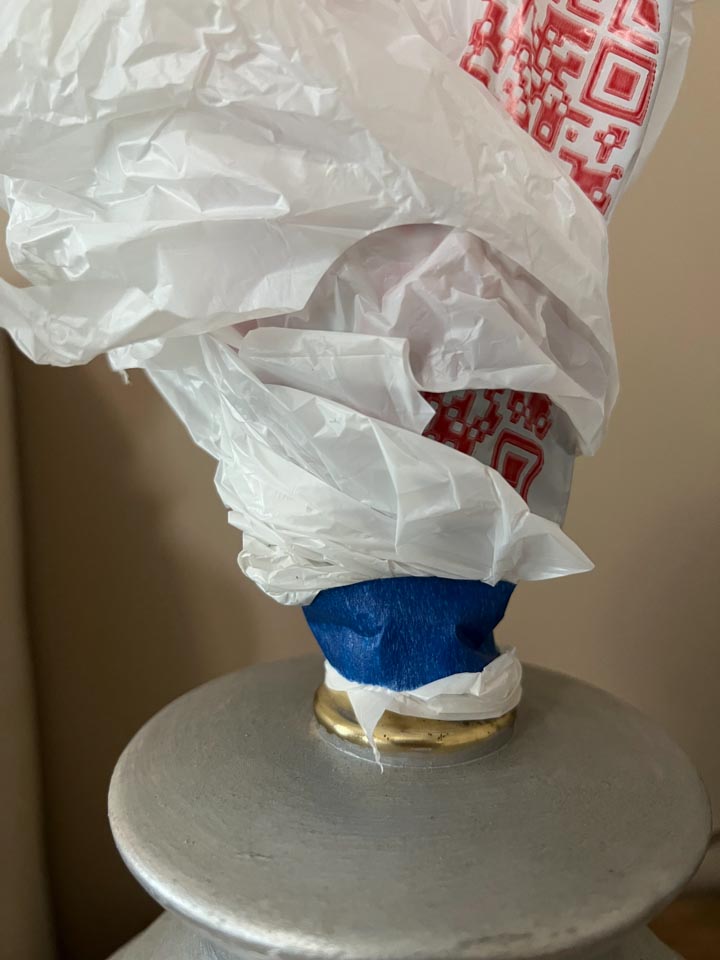
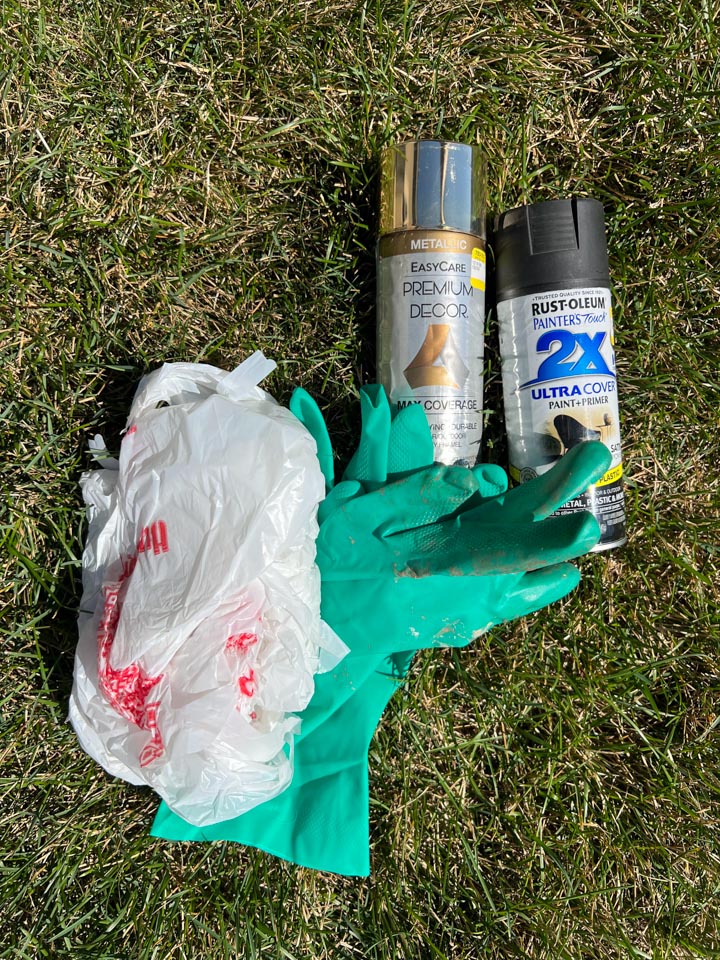
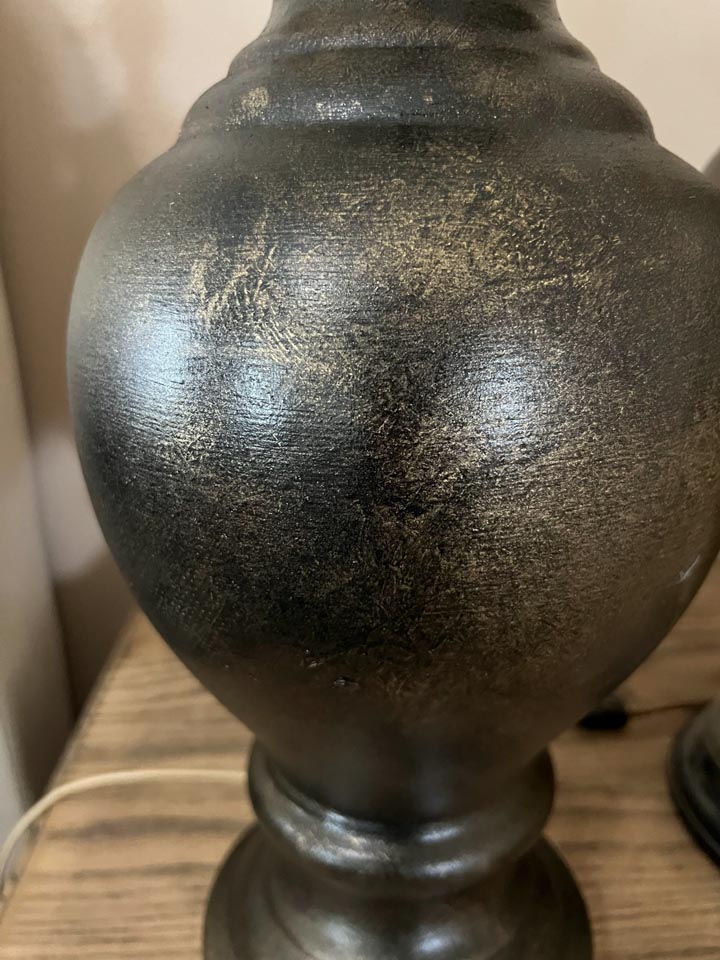
Luckily in the garage I had black spray paint and gold metallic spray paint. I didn’t have a ton left, so I new I had to be smart and careful so that I didn’t run out!
I sat up a painting station in the yard by adding a painter’s drop cloth. In the old house I would have painted away in the grass or on the gravel, but in the new house, appearance seems to matter more! I even put gloves on which I NEVER used to do! This time I did because we had a meet the teacher’s night at the new school and I didn’t want to meet people for the first time with paint all over my fingers!! 😉
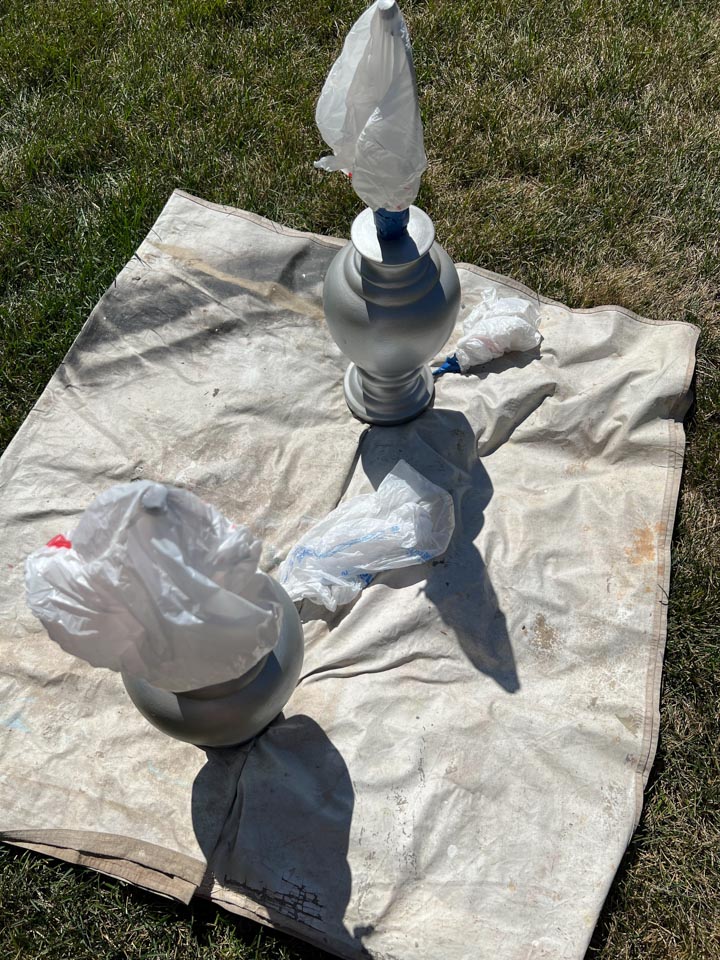
Recently scrolling on social media I had seen someone distress paint using spray paint and plastic bags. I thought I might try to do that.
I sprayed the entire base with the metallic. Then I went on top of the metallic with a light coat of black. Then I dabbed it with the plastic bag. Nothing! The paint had already dried. Darn it! So I sprayed a bit of black and or gold and dabbed as I went.

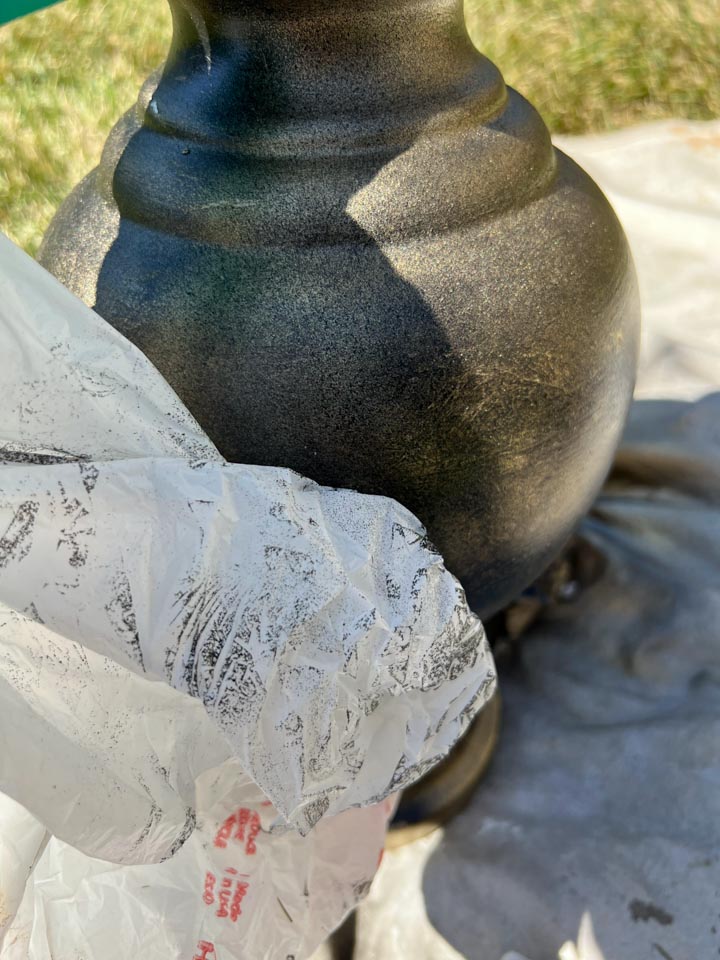
This worked very well when it actually worked but the paint definitely wanted to dry very quickly which made success difficult. If you have someone that could help you, I might suggest that. One person spray a bit while the next dabs with the plastic bag.
Watch How To Decorate Your Coffee Table
Originally, I had just planned on painting it gold and coming back with a dark wax. Being able to rub it in lighter or darker where I wanted. So that would be another suggestion I have to get this look!

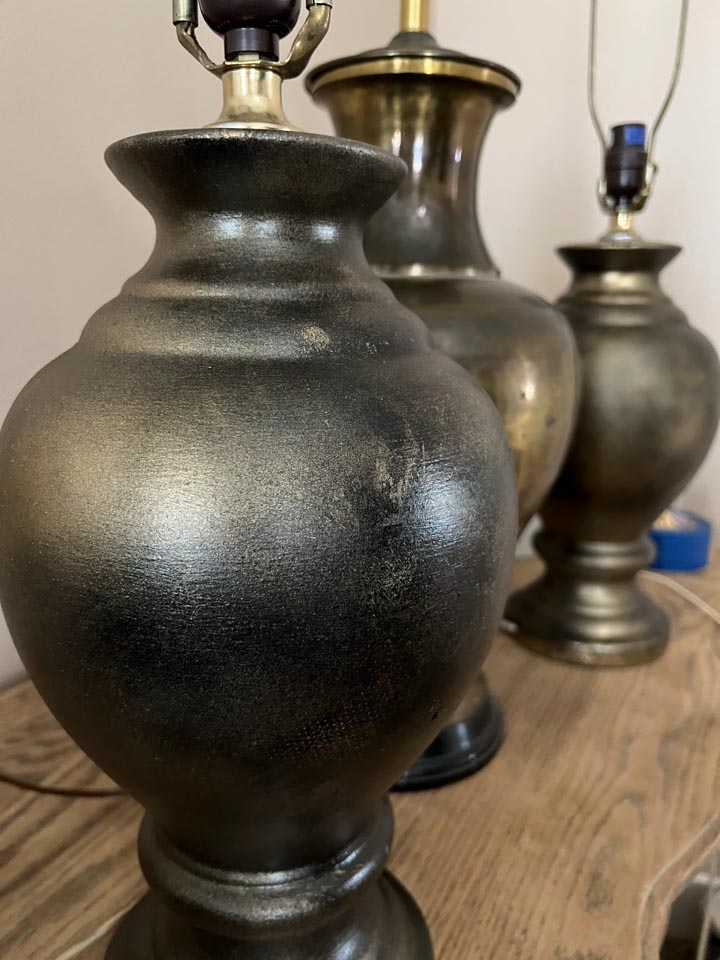
I do love how it turned out! They look just like the old antique brass ones! And I can still keep an eye out when I’m thrifting for some jumbo shades!! Maybe I’ll find some and switch out the lamps, or maybe I’ll keep the ones I just created!
This post may contain affiliate links for the products I use and recommend. I am not paid to promote these products. If you purchase using my affiliate links, I could make a small commission at no charge to you.
Pin It! DIY Lamp Makeover


2 thoughts on “DIY Lamp Makeover – Antique Aged Brass”
They really look good. Thank you for wharing.
Thank you! Guess what I found thrifting this week! One 20 x 12 lamp shade! I needed 20 x 13, but I still bought it! It’s SO big!