Are you looking for a fun way to show off photographs of your loved ones? Maybe a place to hold new or even better, vintage Valentine’s? This easy DIY wire heart display is going to be perfect to do just that!
Sometimes I just need an extra push to be creative and finish a project. That’s what happened when I came up with this easy DIY wire heart display. I’ve teamed up with a group of girls on Instagram to share a DIY project each month. #makersDIYchallenge is the hashtag for our group if you want to join the community and follow the tag!
Each month we share a themed DIY project. The rest of the month we encourage you to share one too! That helps us keep each other accountable and creative!! This month’s challenge was to create a NO SPEND DIY!
#MakersDIYChallenge
This challenge is perfect for me because I love to use what I have to be creative. Oftentimes that’s the only way I do DIY projects! I see something I have ample of lying around and I try to think of a way to use it up!
I never understand when people do crafts or DIY projects and they go out and spend a lot of money just to make something! When I do crafts or DIY projects it is to get rid of something!!
Being forced to be creative is a necessity sometimes. There is always something to do as a mom and entrepreneur, and DIY’s are not always my top priority! Knowing that I needed something for our DIY challenge group I started looking around the house!
I had thought about using tinker toys, like I did in THIS project. However, I used them for last months project, so I figured I should change it up. But just in case you missed the LAST project, you can use tinker toys to display vintage Valentines and other ephemera, just by sliding the cards into the slits that are at each end of the tinker toy.
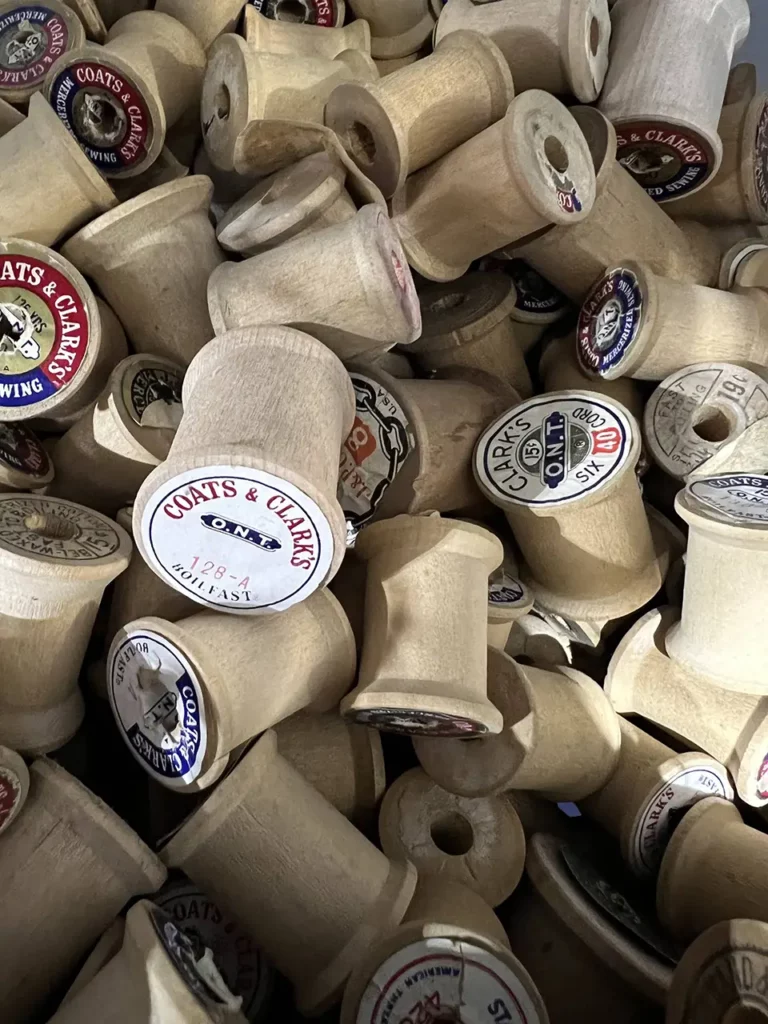
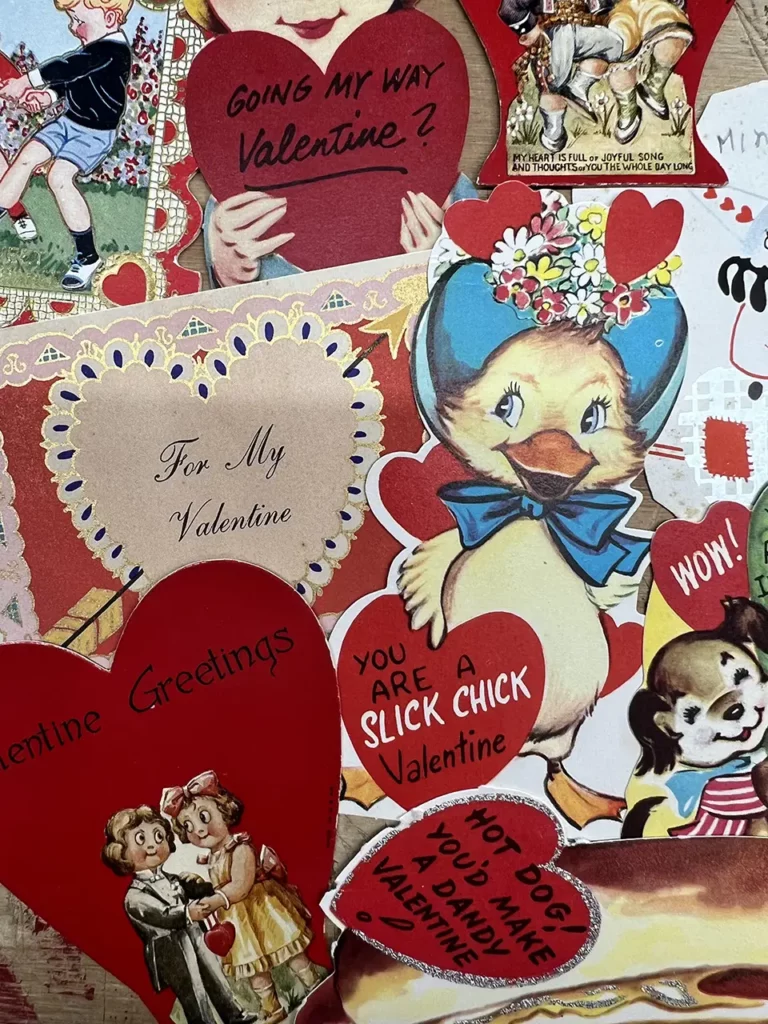
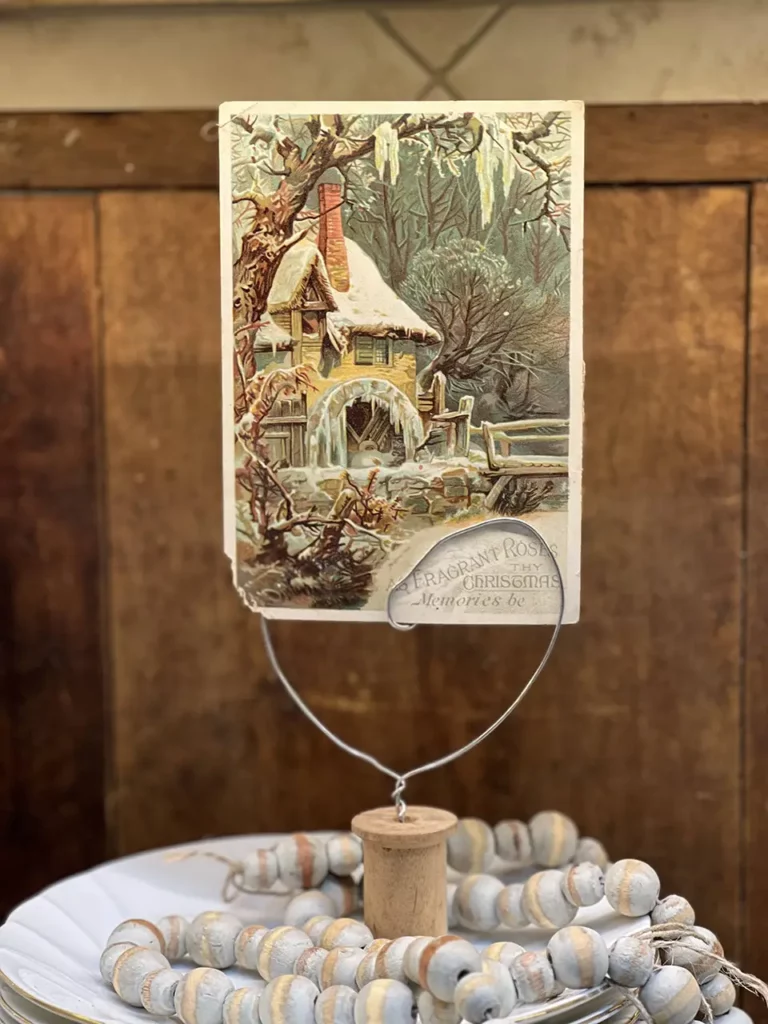
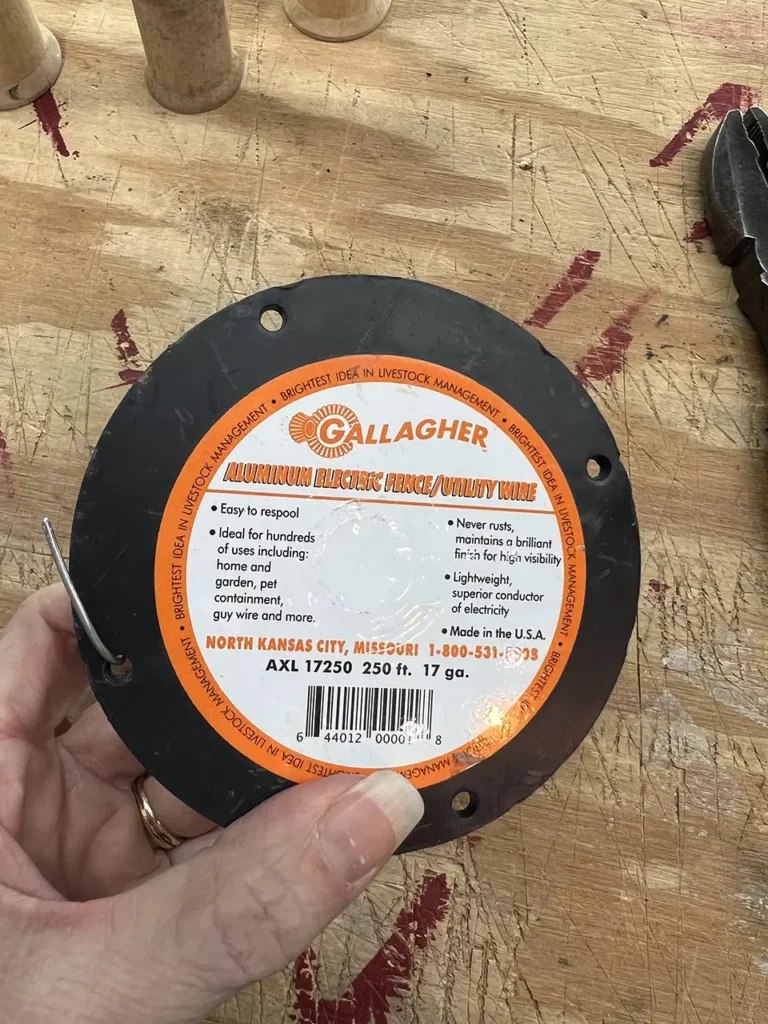
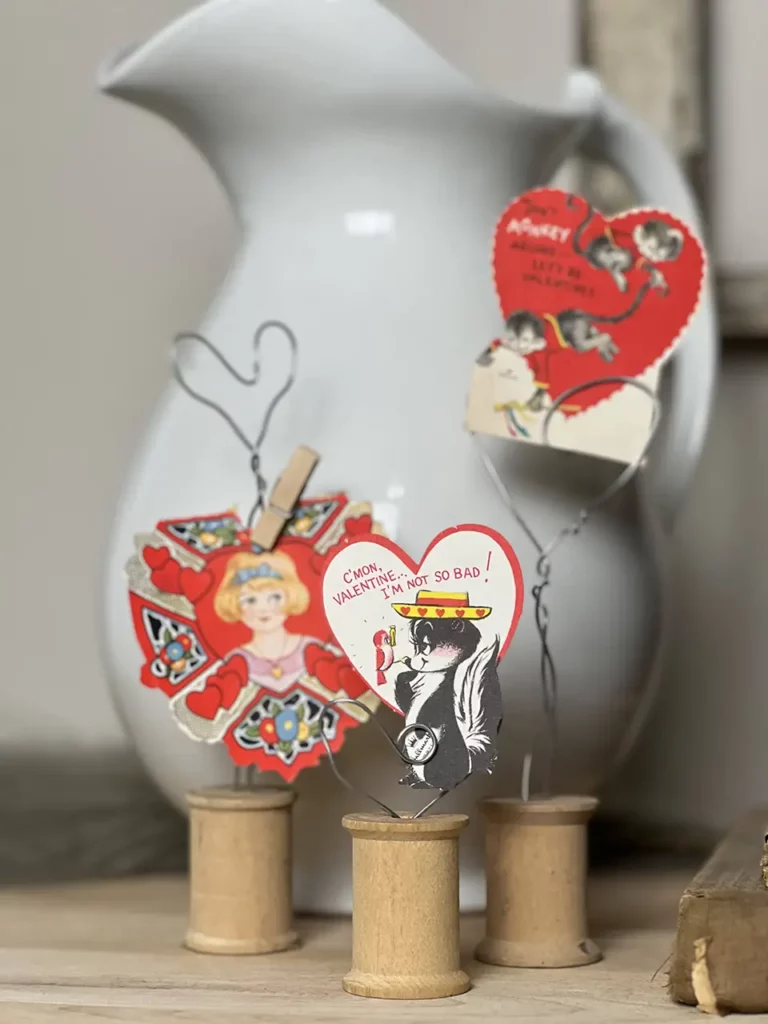
Since Valentine’s Day is fast approaching, I wanted a way to share or display Valentine’s. I have a TON of wooden spools right now. They have always sold well and they make a great bowl filler! I currently have a ton sitting in a candy jar like THIS.
The idea to use wire and make hearts from it, just popped into my head because it would be EASY! Then, I just started playing! You will see that all of my DIY wire heart display’s are a little different and I did make a couple and then started over!
The best way to figure out what works, is to just start doing it!!
Easy DIY Wire Heart Display
Shaping the Wire Heart
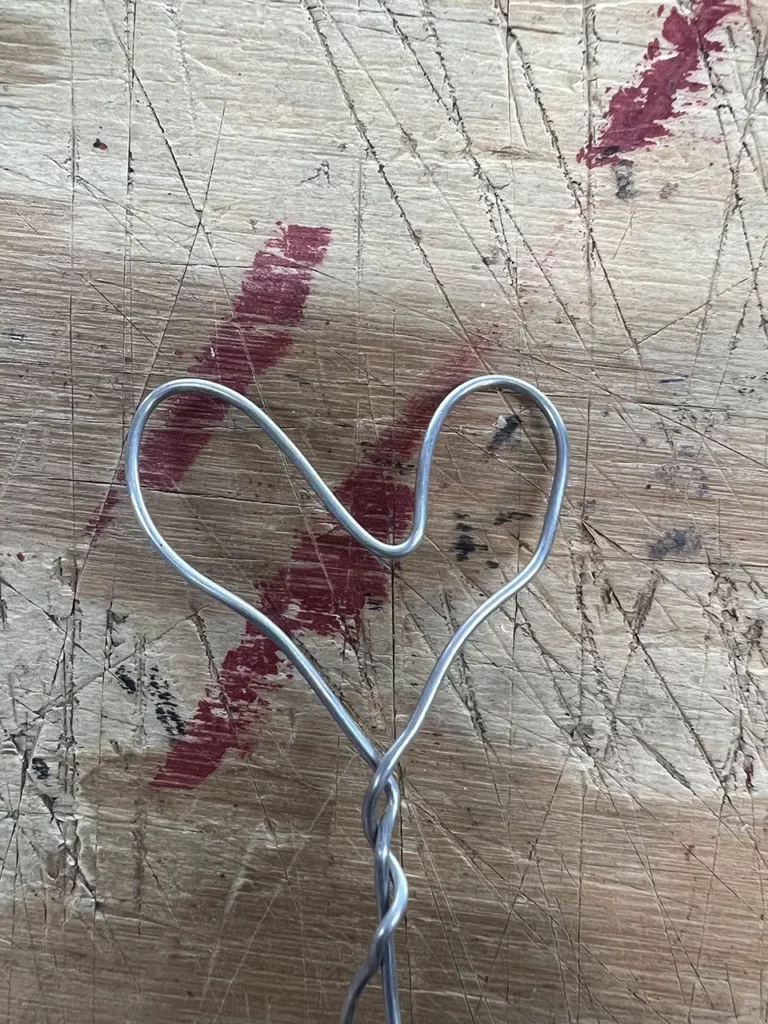
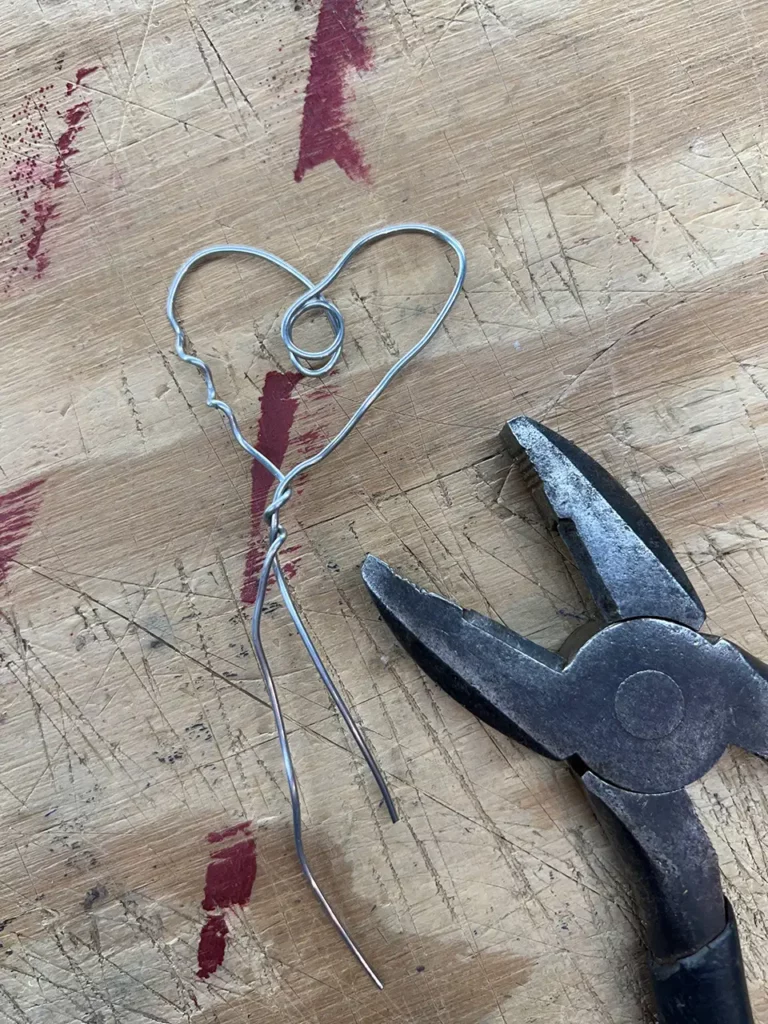
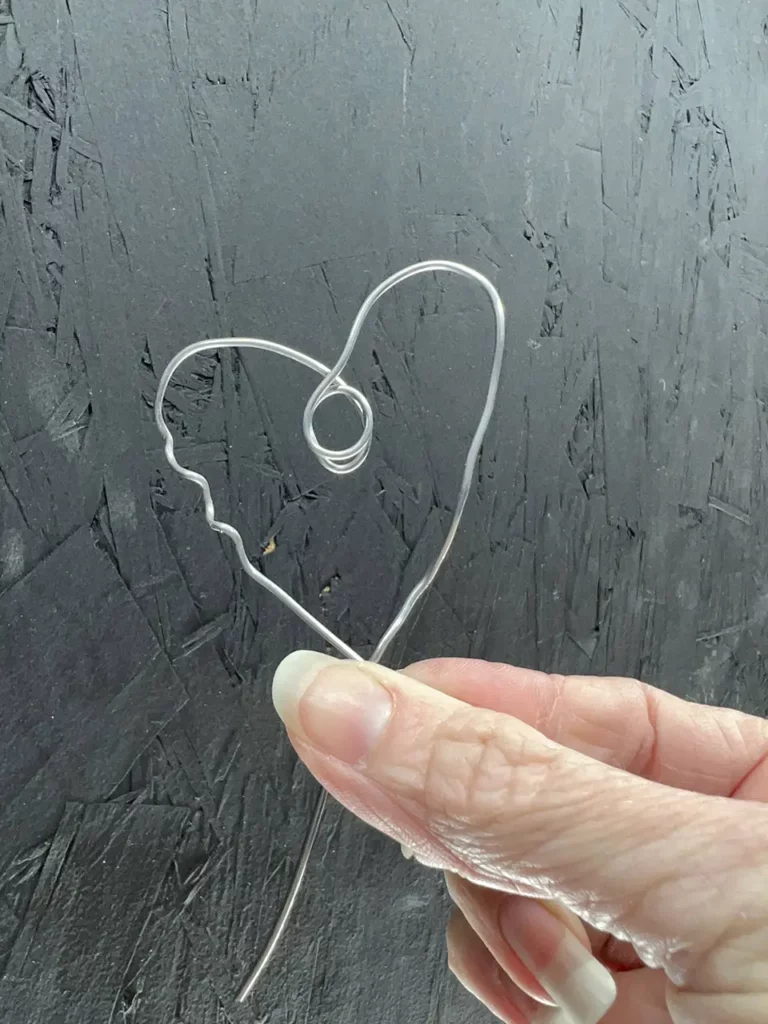
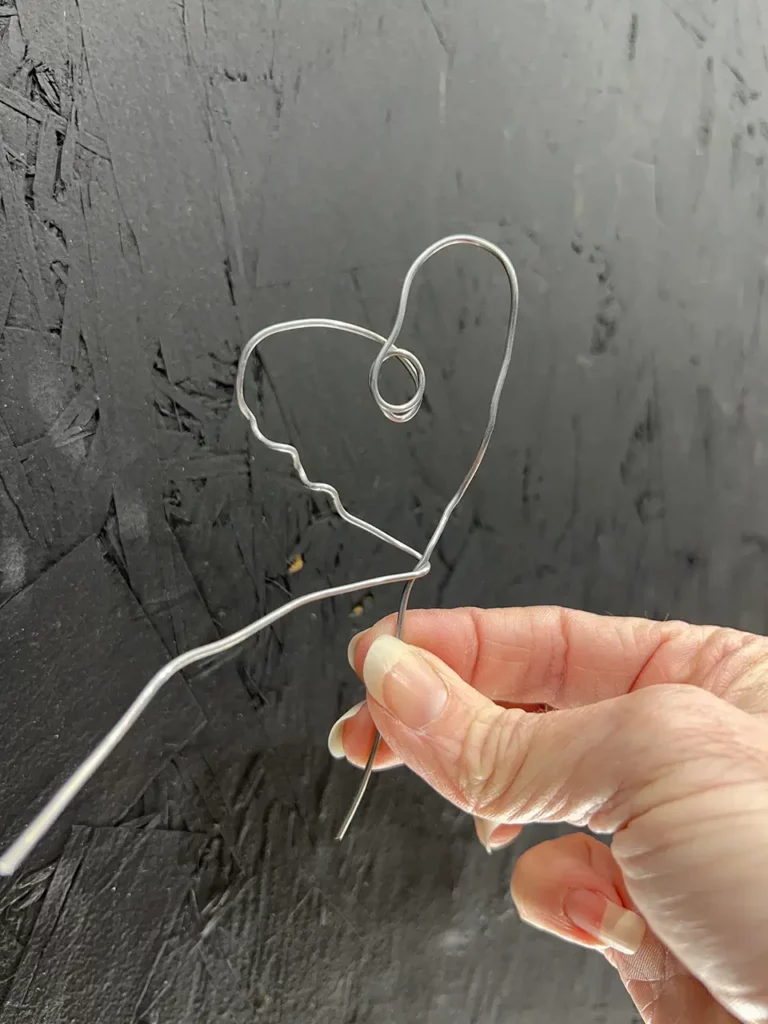
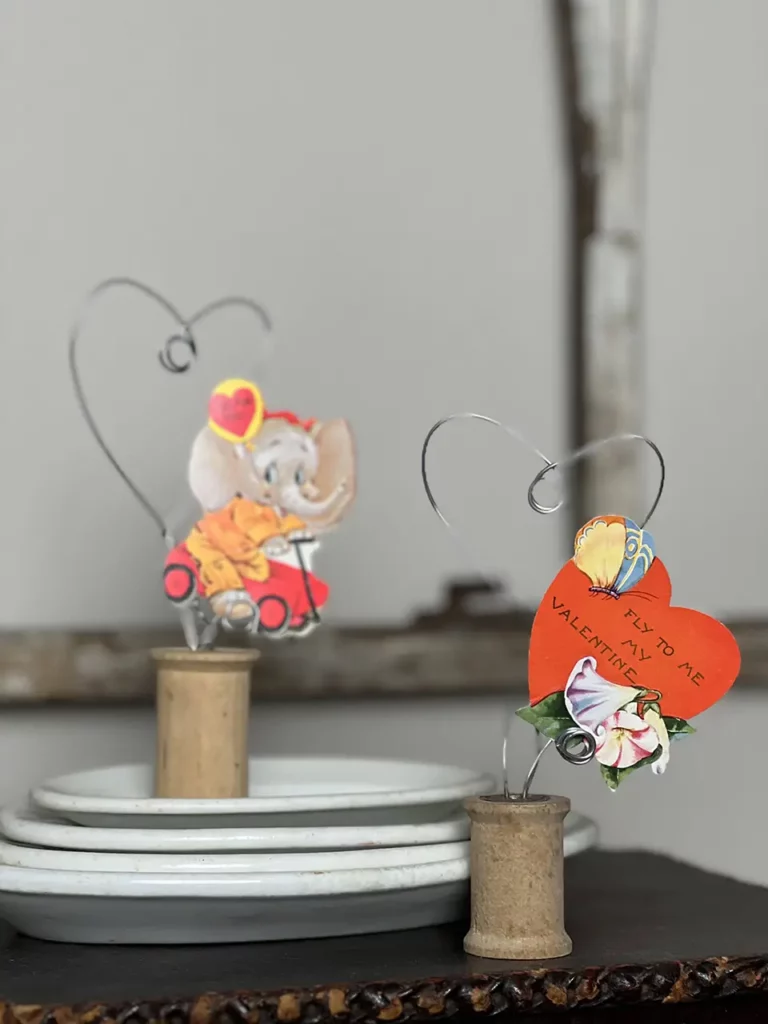
I started with trying to shape the wire into a heart. That was pretty easy because the wire was pretty flexible. I didn’t want the hearts to be perfectly shaped. Part of the charm is the character that comes with it looking homemade.
However, I failed to take into consideration how the card would be held into the heart. Displaying vintage Valentine’s was the point of the project! Figuring out how to make the wire heart hold the card was a necessity.
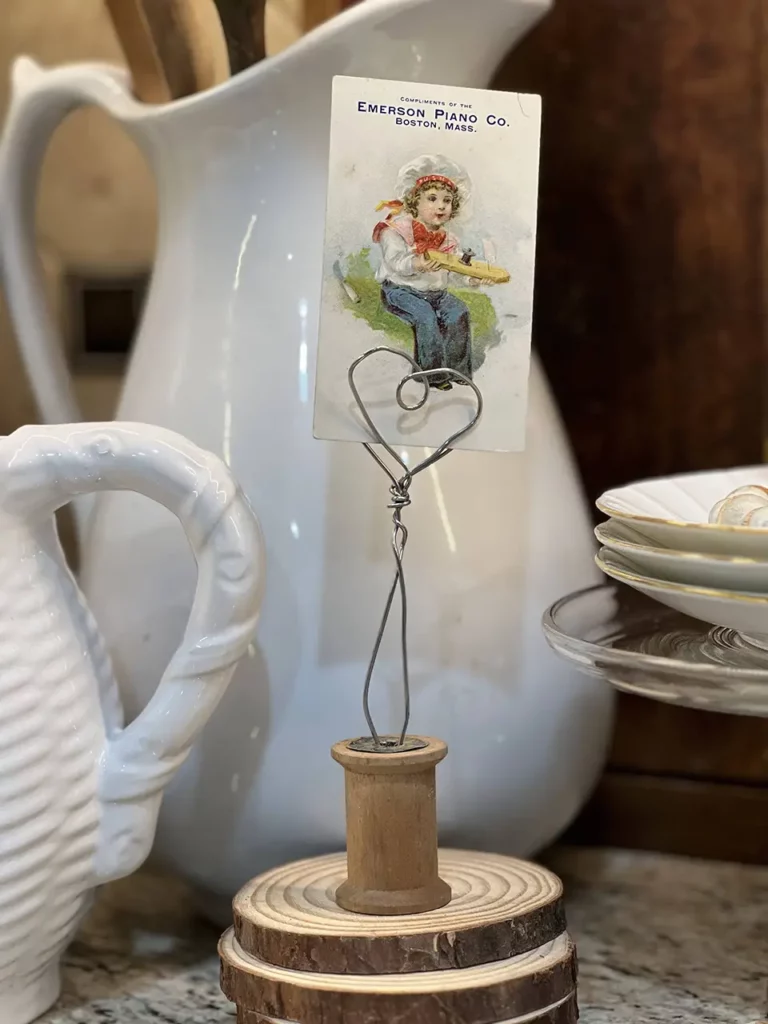
I ended up making a loop at the top of the heart so the card could slip in. These looked really cute, but the look completely changed once you slid a card in because half of the heart was covered by the card.
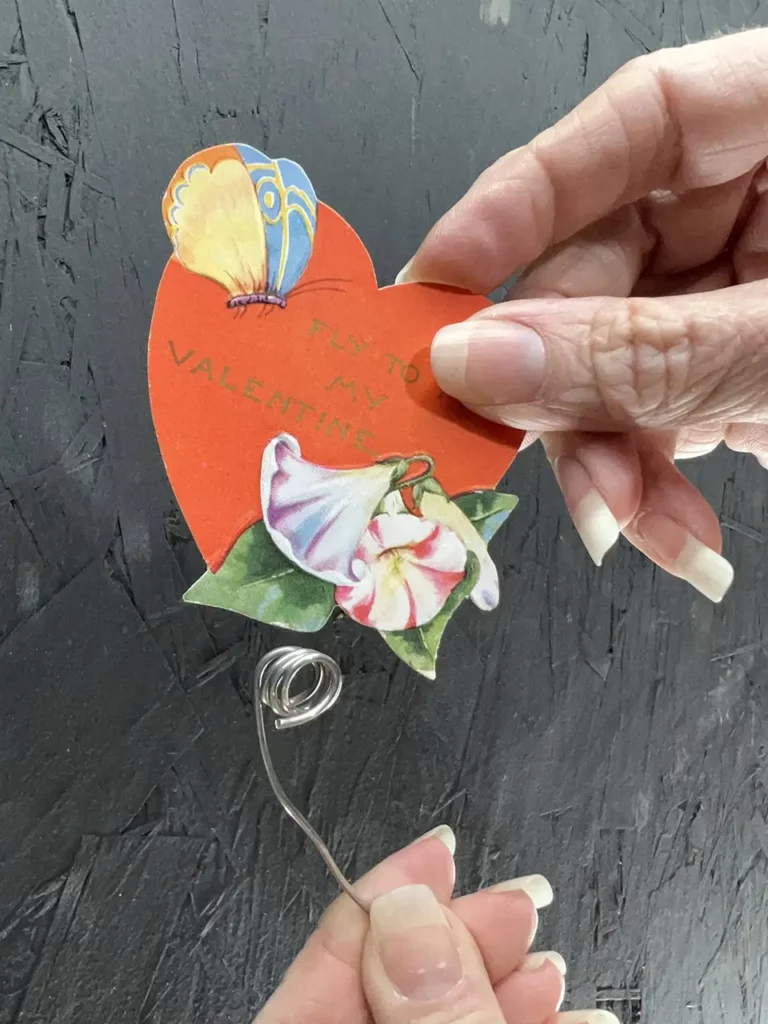
After making quite a few of these, I came up with the idea to make two hearts essentially at the top that “clap” like a paper clip, so that the card would be held, yet the full wire heart would show too.
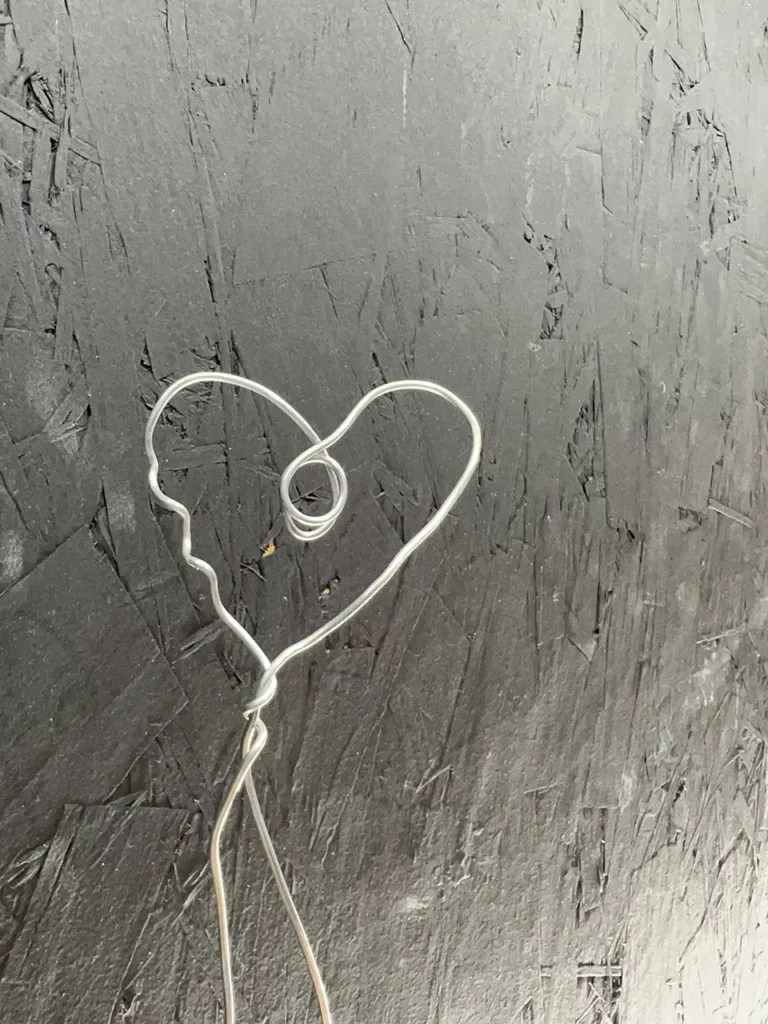
Another option is to use another piece of wire to make a coil. I used that coil to hold the card and then higher up you could see the full heart.
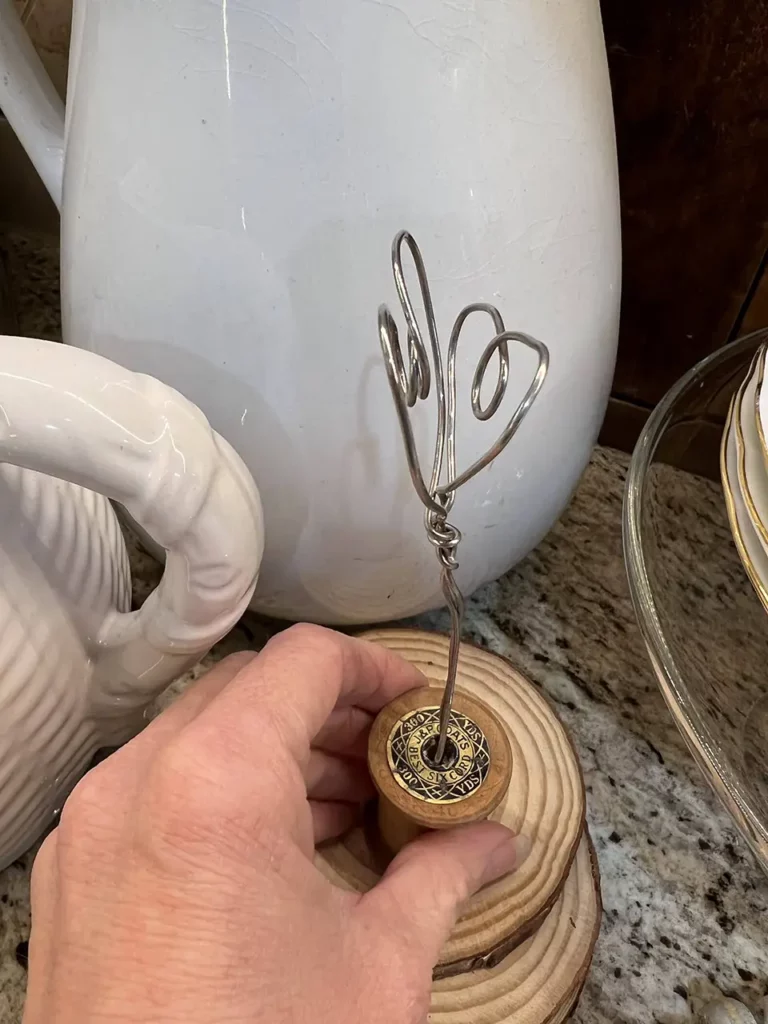
But now I had to figure out how to get the heart attached to the spool.
Attaching The Wire Heart to the Spool
At first I tried twisting the wire around the outside of the spool like it would have held string. The wire wanted to expand and slip and slide, so scratch that idea. If it had stayed tight and in place then I still wasn’t sure if I’d like the look because the wire would come up on the outside of the spool instead of up through the center.
My next attempt I threaded the wire through the center of the spool, but immediately decided that wasn’t a good idea because the spool wouldn’t sit flat. The only way that would have worked is if I had done it twice, so that the bottom of the spool had wire making a plus sign versus just a line.
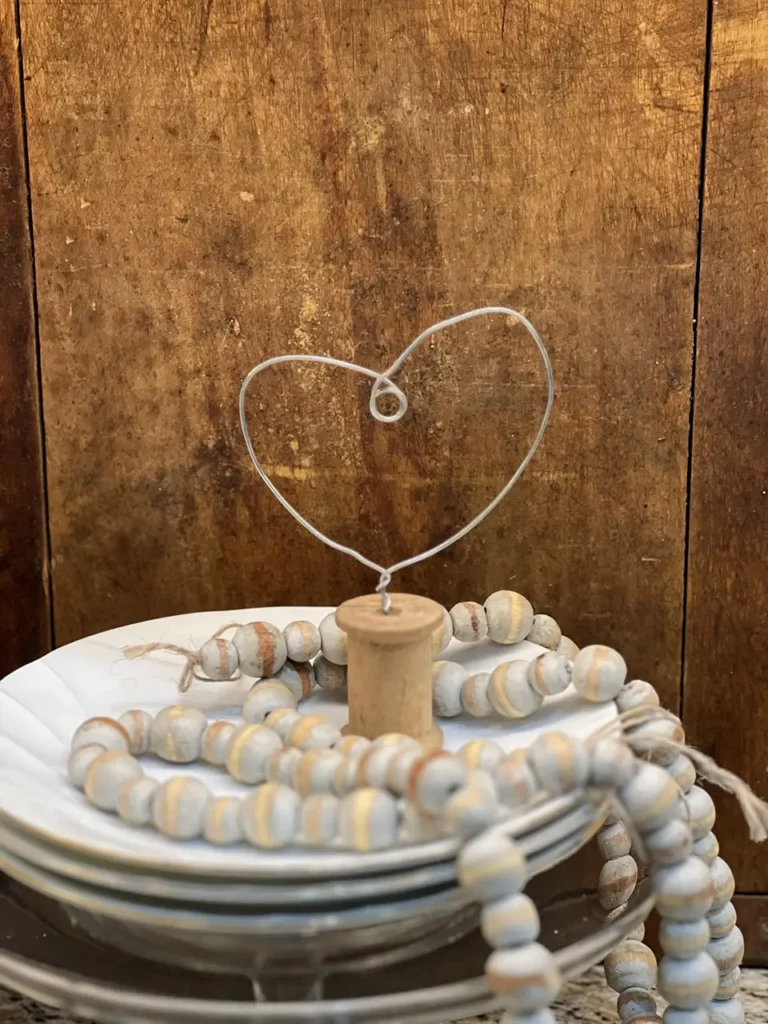
Instead, I scratched both of those ideas and decided not to try to wrap the wire, but instead, just insert into the hole in the spool. I wasn’t sure if it would hold, but I figured I could always squirt some hot glue into the hole to keep it secure. Honestly, you don’t even need to do that!
Twisting the wire seems to put a good amount of tension on the wire, so it stays put in the hole of the spool.

Proportions
All of the vintage Valentine’s I had were small. The small ones ended up being the perfect size for my hearts and the spools. If you have larger Valentine’s, then I would suggest shaping a larger wire heart to hold your card like I did below.
Or! Make a taller stem on your heart that will allow room for you to use a clothespin to hold your Valentine below the heart. There are so many options! This is a very flexible and easy DIY project!
Step by Step
Supplies for Your Wire Heart Display
- Wire
- Wire cutters
- Wooden spool
- Photos, Valentine’s, or other ephemera
Shaping the Wire Heart
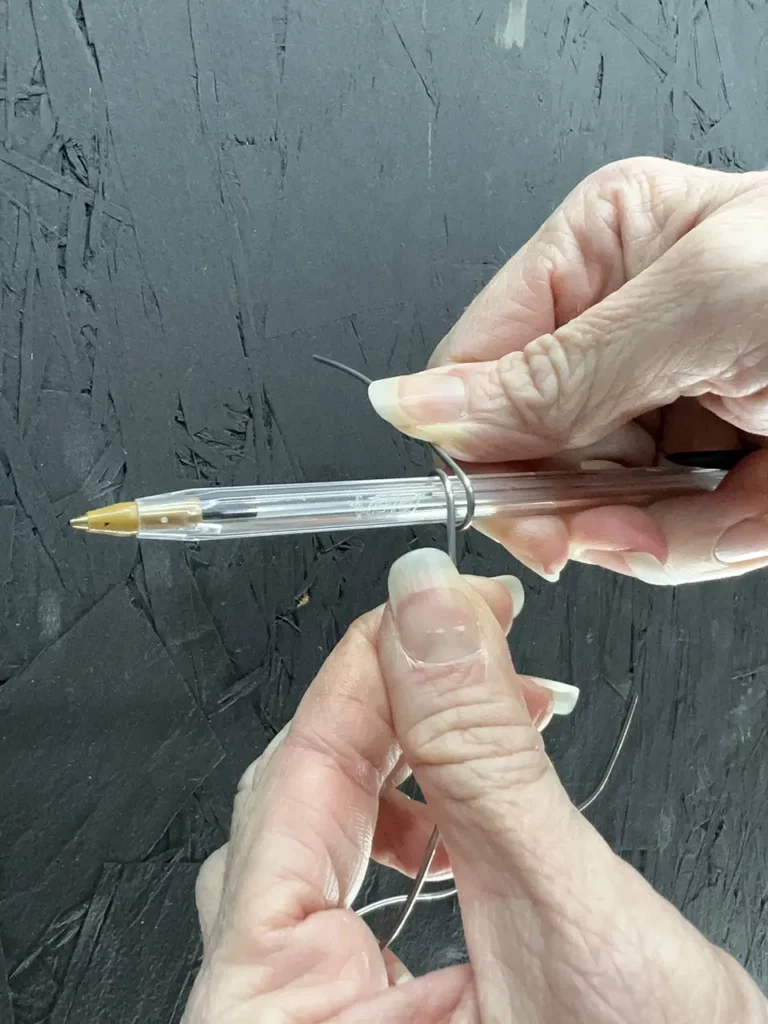
Working with a long piece of wire (longer pieces are easier to work with, remember you can always cut off the extra), twist the wire into a small circle or wrap it around a pen/pencil.
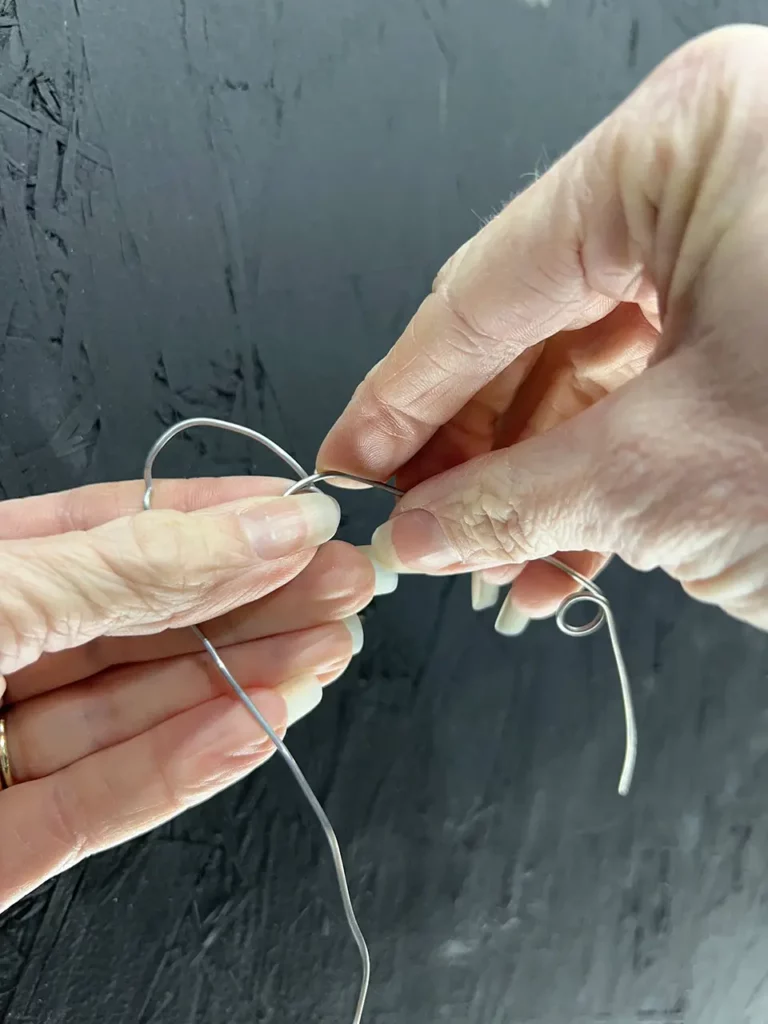
Partially untwist the loop you just made to shape the top part of your heart. I used my thumb to curve the wire, but you could use something like a pill bottle or cup (depending on the desired size) to shape your heart at the top.
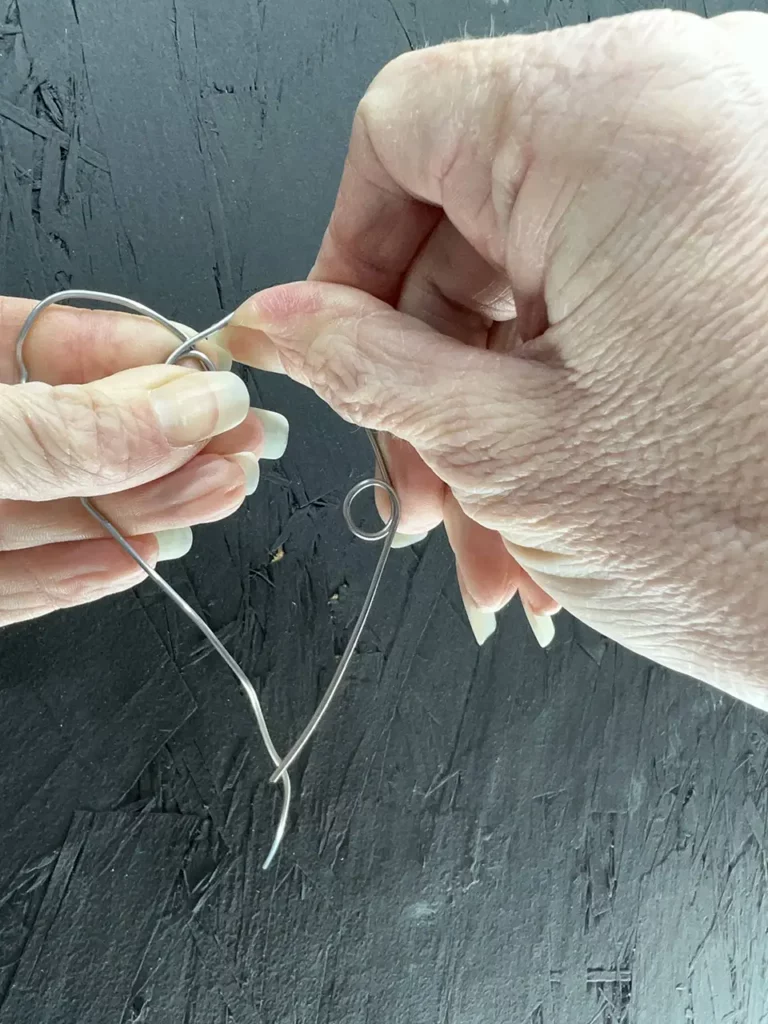
Bring the ends of the wire together to make the desired shape and twist. You want to use the wire cutter to trim the ends to the same length. You can keep them short or long depending on how far out of the spool you want them.
Watch Me On YouTube
More Easy DIY’s
Looking for another heart idea? Check THIS one out!
Here is a fun centerpiece idea!
Checkout My Reel
This post may contain affiliate links for the products I use and recommend. I am not paid to promote these products. If you purchase using my affiliate links, I could make a small commission at no charge to you.