Super cute terra cotta pot wreath. Let’s learn how to make one!
A while back I saw these cute wreaths made out of little miniature terracotta pots, so guess what I’ve been on the hunt for… some miniature terra cotta pots to make my own wreath. There was a time when I couldn’t sell a terra cotta pot! So, I ended up doing a little upcycle on them like Natalie at My Vintage Porch did. Check those out HERE.
Then, I start selling online through FACEBOOK and they sell like hotcakes, especially the little ones! I knew the only way I was going to be able to have enough to make a wreath is if NO ONE saw them before I finished the wreath!
So when I FINALLY found some, I stashed them away until I had a good assortment to choose from to make the wreath! I had a vision in my head and I was looking for small pots, ones with some good aged patina and character, AND I wanted a variety of sizes and shapes.
Click on the button below to watch me create this terracotta wreath.
Tools and Materials
To create this wreath, you’ll need:


How to Create This Terracotta Pot Wreath
I already had some wire wreath forms that I had purchased on Amazon. I tend to keep some on hand in case I have a spur-of-the-moment idea. Living in a small town, I can’t just run to the store to get something I need when I’m ready to be creative! I’m sure you know there is nothing worse than being struck with inspiration without having the supplies ready to bring it to life.
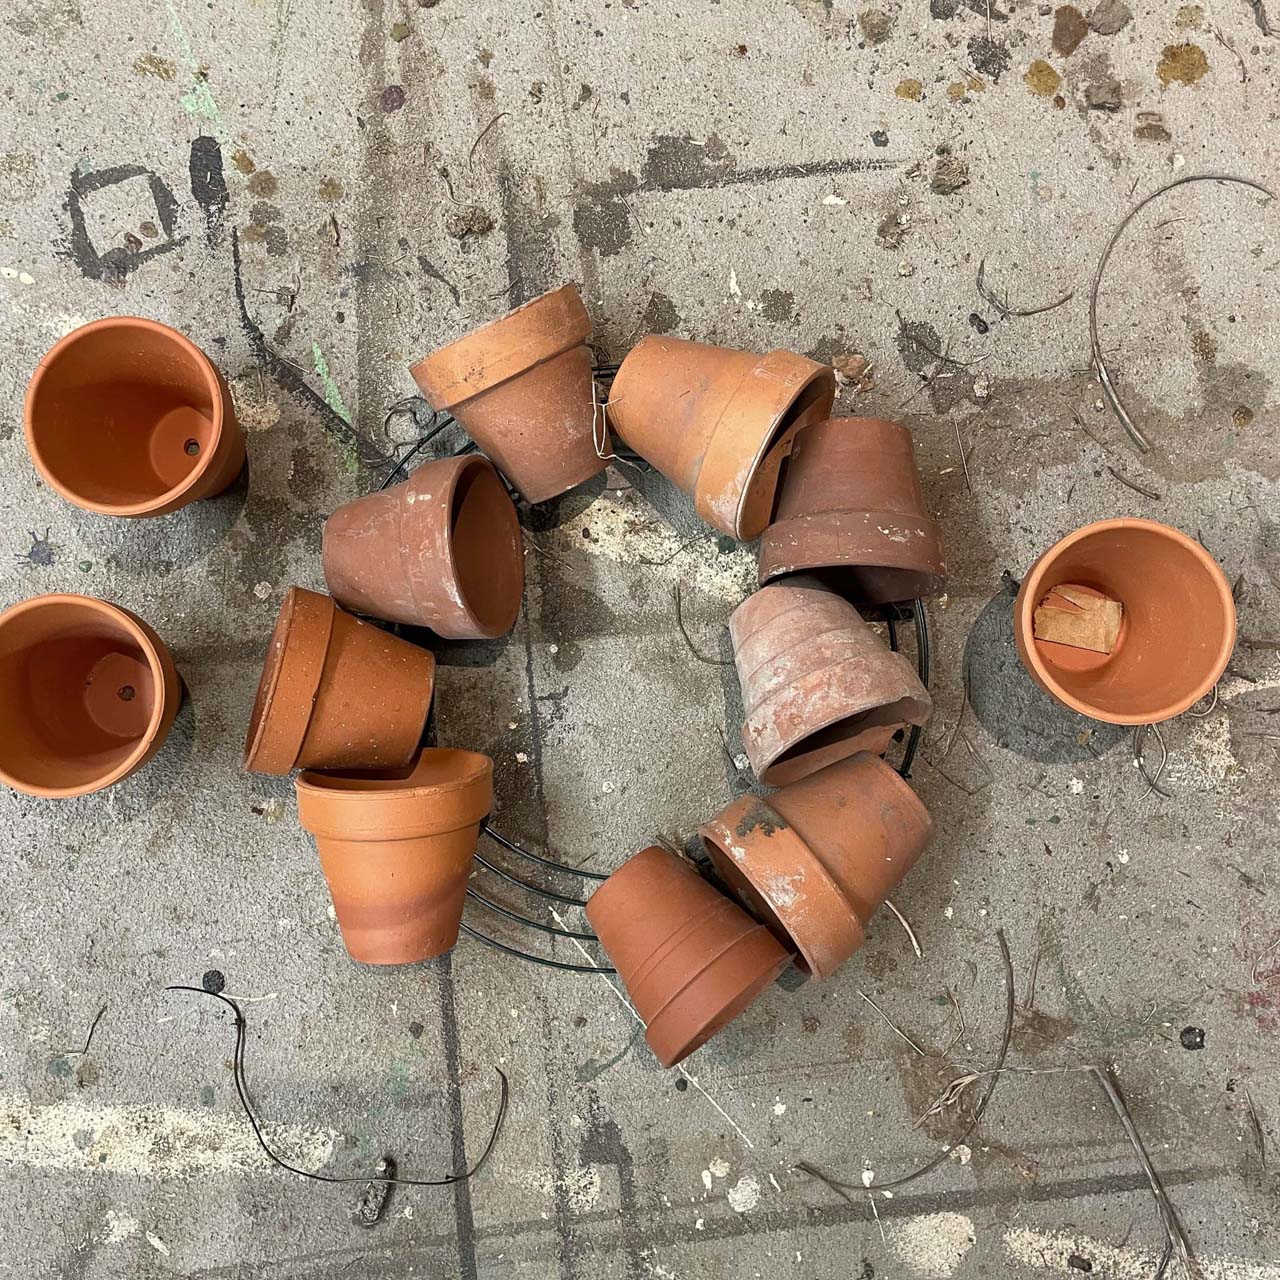
Gather Supplies
Now I had the pots and the wreath form, but what next. When I tell you I see a photo on Pinterest or Instagram that I use for inspiration, that is it. I only use the photo as a starting point and then I figure out how to actually execute it myself. I don’t like to buy a lot of things for projects, I really like to use what I have on hand and because of that I don’t feel like I need their step by step directions. I like to wing it based off of what supplies I have AND what I like.
I shared the DIY video I made of this project above. HERE’s that link again. Now if you watch the video AND read the comments, you will see that people are very opinionated, especially when your style does not match their style!! I made this wreath the way I envisioned and it’s what I like. You can take this and use it for inspiration to create a wreath that you like and is your style! That is the beauty of DIY my friends!!
My experience with hot glue sticks is that if it gets really hot or really cold, or if the temperature fluctuates, they often lose their tackiness. Because of that I really try not to use hot glue on projects. But, in the same breath, I’m often creating videos of my DIY’s and for a video I need something that holds or sets quickly.
Attach Pots to Wreath Form
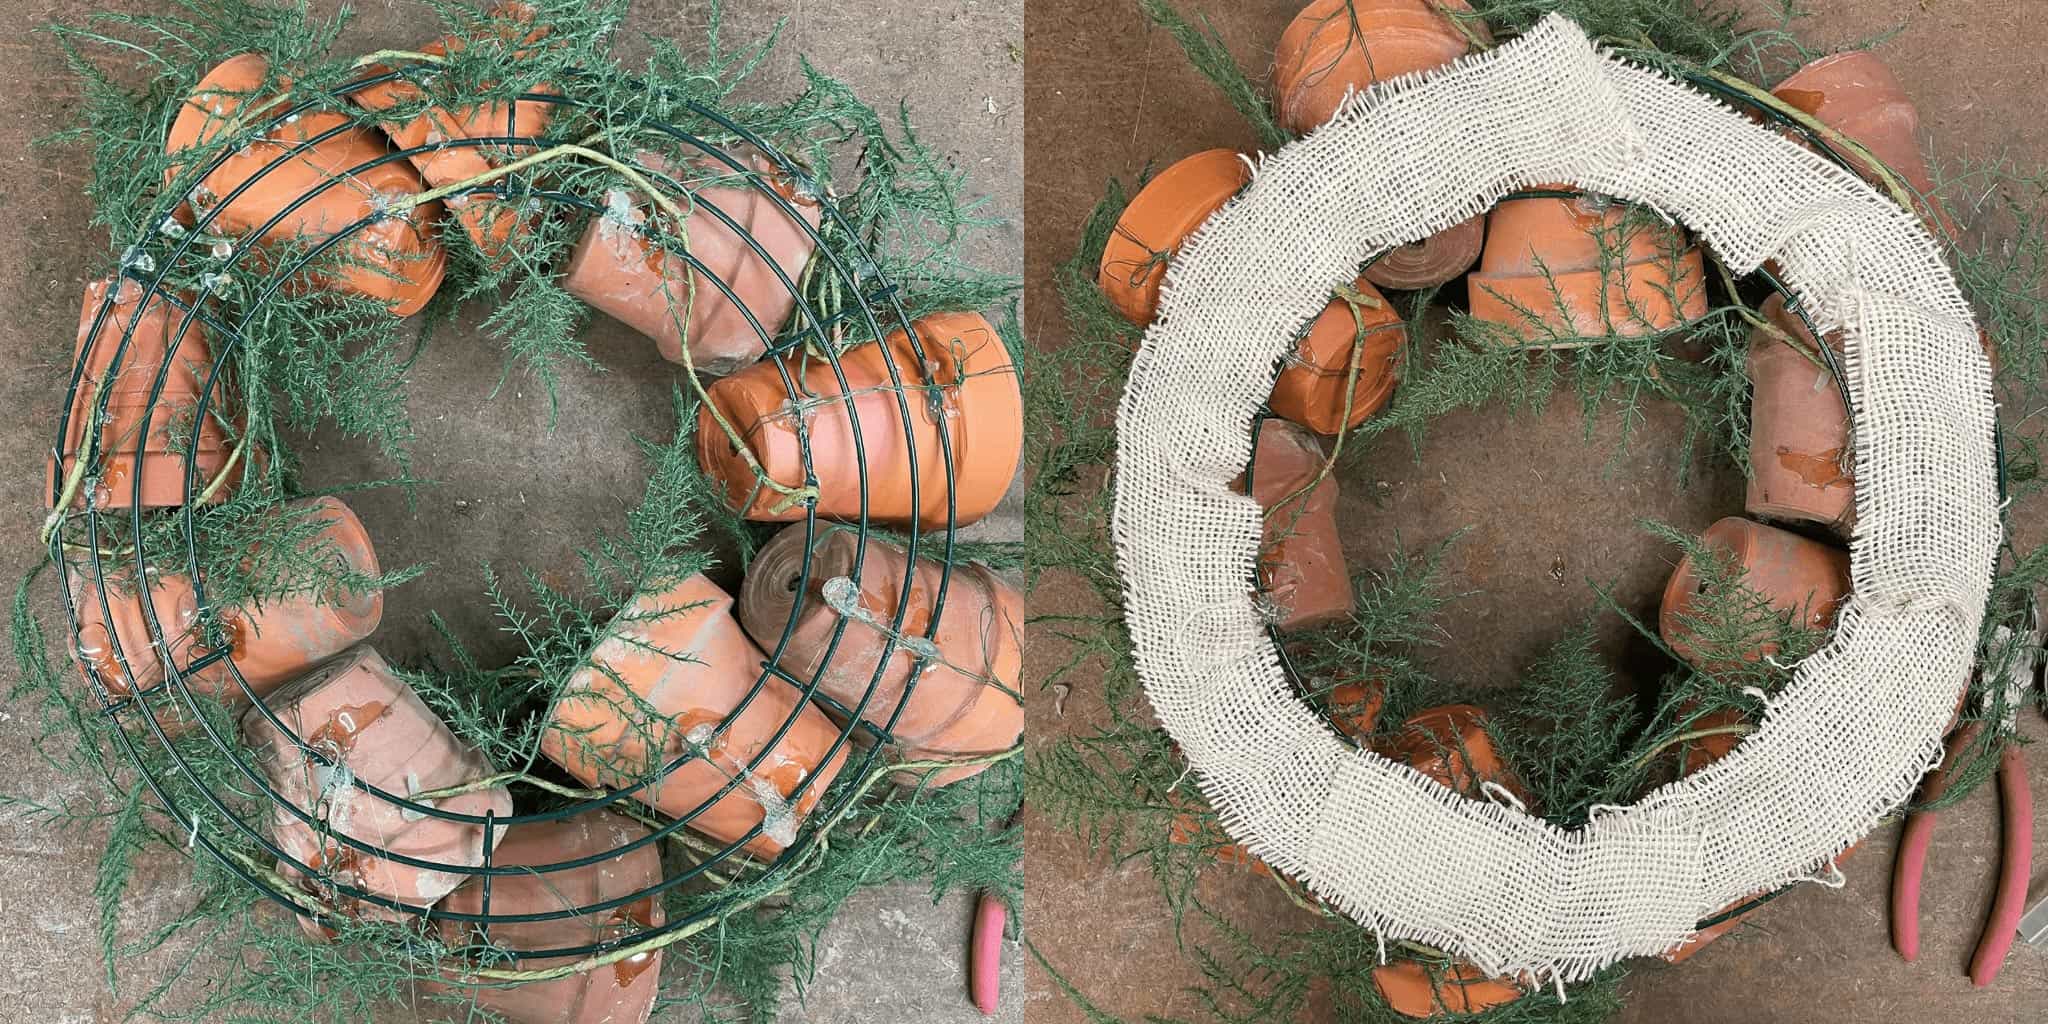
For this project I put the wire through the hole in the bottom of the terra cotta pot and wired it onto the wire wreath form. I figured this way if the glue lost its tackiness, that at least the pots would be attached to the wreath form and not fall and break. If you saw one was loose, you could just reglue it!
I was hoping that the wire would be enough to hold the pots in place on the wreath form. But, it was very hard to get the wire tight and the pots definitely wanted to move around. To help keep each pot in place I set each with hot glue. Using the glue allowed me to turn and angle the pots in different directions. Knowing that this wreath would probably go on someone’s porch, I then went back and reinforced it with E6000 glue. The hot glue held it in place so I could continue to work and the E-600 glue would be another way for the wreath to survive the heat.
Doing all of this creative attachment, made the backside look REALLY crazy!
Add Greenery & Embellishments
The front of the wreath was looking a little bare at this point. You could see tons of glue, wire from attaching the pots, and the wire wreath form. Originally I wanted to tuck in sheet moss that I had on hand; however, I didn’t have quite enough. Of course, right! I love using this moss and think it would be a great option if you make your own wreath. HERE it is on a birdhouse and HERE I used it to create a backdrop!
But, since I didn’t have enough on hand I had to go to plan B. I ended up using some greenery that I had on hand to cover up the glue and the wire and to give it a little bit of color. I weaved the greenery stems in and around all of the pots to cover everything, but also distributing the greenery evenly around the wreath form. Again I used glue to help hold them in place.
When I shared this DIY on Facebook, I got a ton of requests to put real plants in the pot, which is definitely an option. There are many examples on Pinterest where they have all of the terra cotta pots facing up so that you can put plants in them. Remember this is what I wanted to do and when you make one you can do what YOU want to do! In addition to actually adding real plants, you could paint your pots, and a bow, ribbon, faux birds or bees, or other decal. The sky is truly the limit with your options! HERE are some other examples.
Watch Me Make The Wreath
Here Is the Finished Product!
If you wanted to embellish the wreath, you could add some ribbon, birds nest eggs, paint, or even some flowers to give it a pop of color. Since I’m more of a neutral home decor lover and like things to be pretty simple, this is how my wreath turned out and I’m loving it! Not only could you hang this outside on your potting shed or porch, buy you could hang this inside as well!
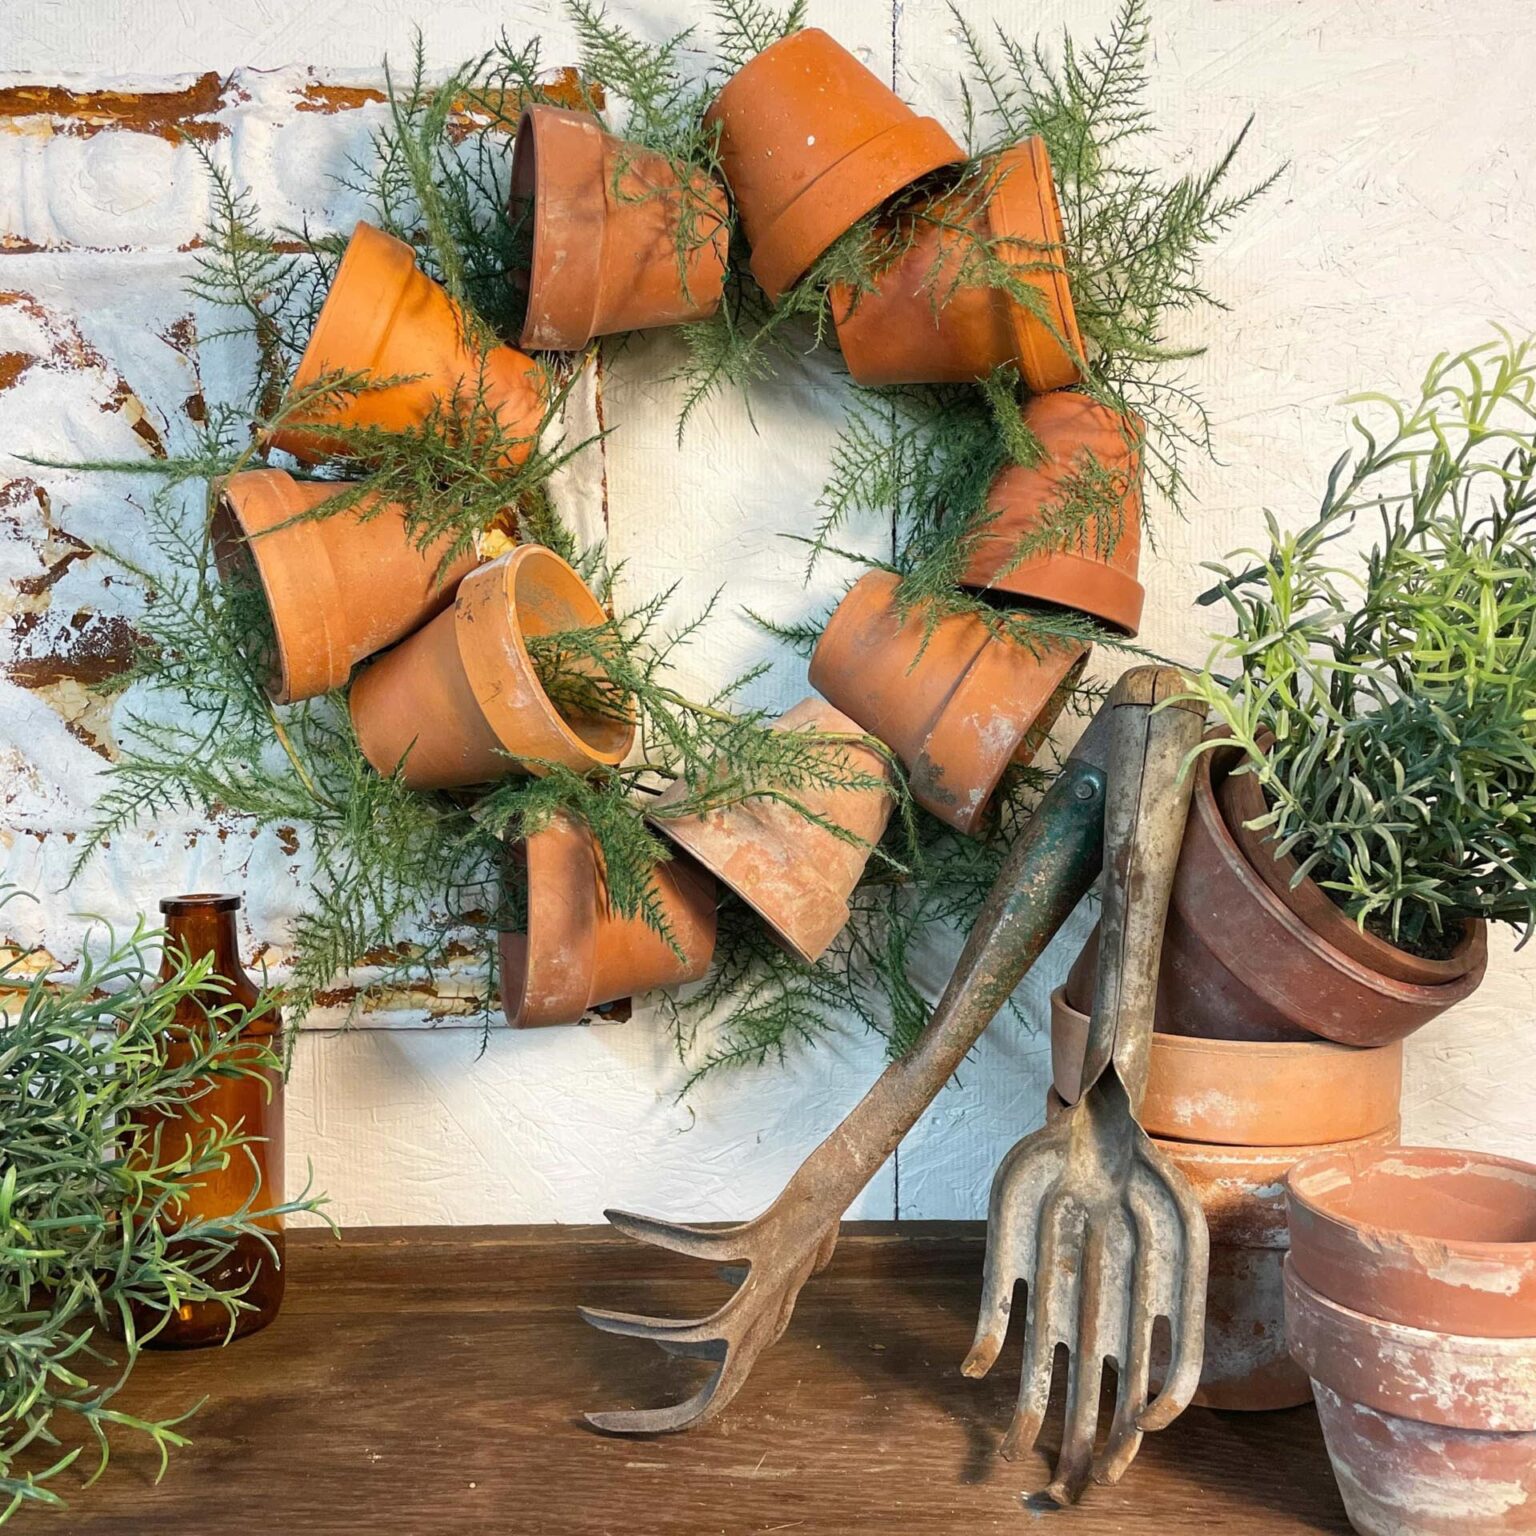
So hopefully seeing this wreath tutorial helps motivate you to make one of your own. I would love to see your spin on a wreath made from terra cotta pots! Show me your creation by tagging me on Instagram @TheJunkParlor.
Disclaimer: This post includes affiliate links.
Pin & Share It

