I am back with another awesome ceiling tin project! If you missed it, check out my post about How to Make the Perfect Chippy Tin Tree.
I love to do projects with junk, and the things that I already have. I have plenty of scrap ceiling tin, so I figured there was more than one project that could be done.
To get ideas for my projects, I have mentioned that I like to look on Pinterest. However, not all my project ideas come from Pinterest. Since I spend so much time on Instagram I also get a ton of ideas there! This project just so happens to be one I found on Instagram.
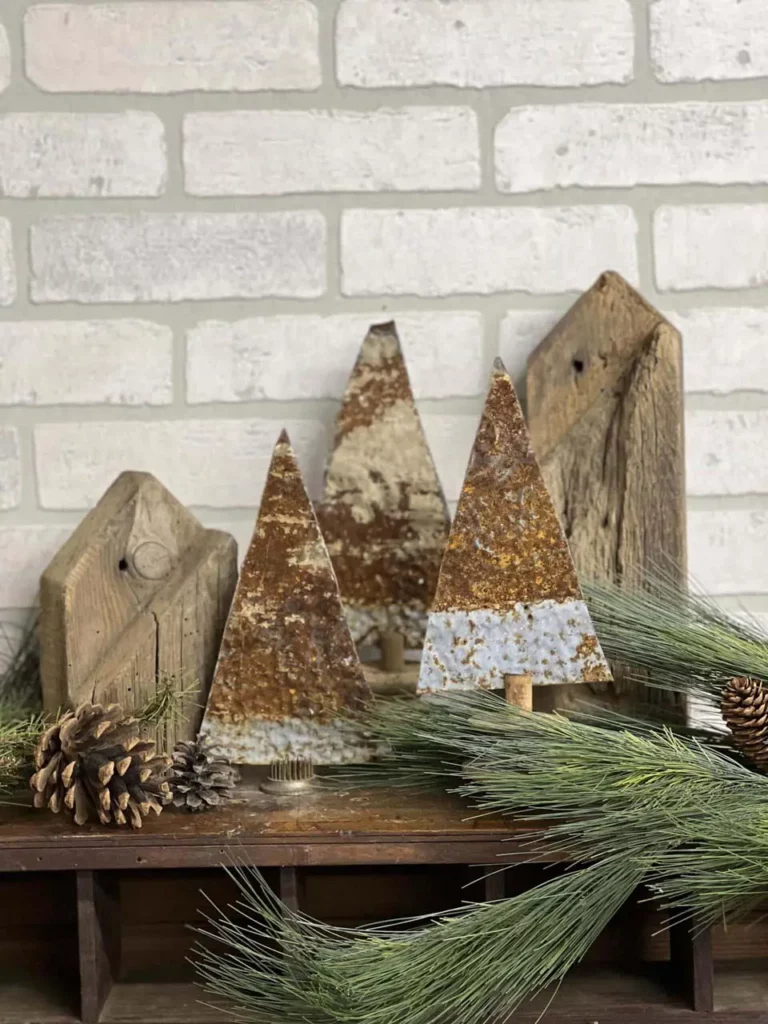
This project is from Desiree at @househaberdashery on Instagram. This photo shows the awesome little forest of ceiling tin trees she made that inspired me to give it a try!

If you want to grab a cup of coffee and hang out with me while I work on this project (and hear about my thought process) watch my live video:
Supplies
- Old ceiling tin
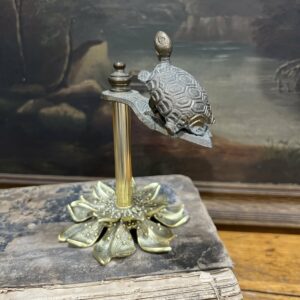
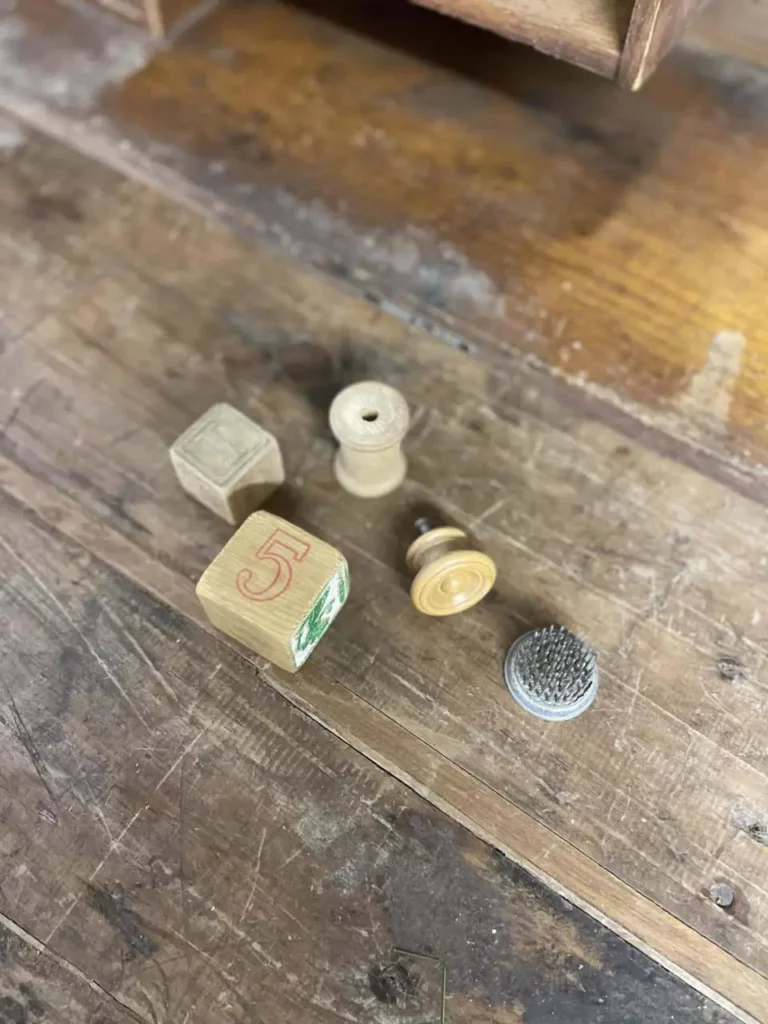
- A base (old know, flower frog, blocks, wooden spool, etc.)
- Tin snips
- Gloves
- Chalk
- Ruler
Ceiling Tin
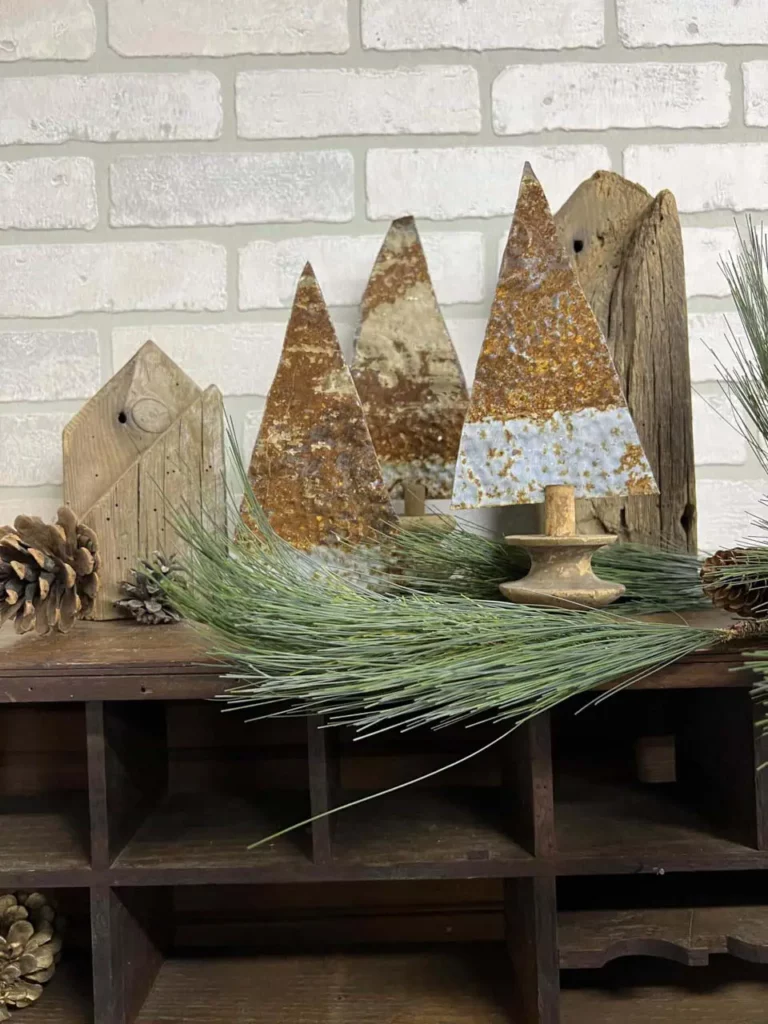
As I have mentioned before, my ceiling tin is left over from a project I did in my old shop in Centerville, Iowa which was a little brick church. I had cut the ceiling tiles to size and covered the acoustic tiles in a drop ceiling at the church. I loved it! Recently I have started collecting ceiling tin again to cover drop ceiling tiles in a basement bathroom.
The tin that I am using for my 25 Days of Christmas DIY projects is tin that I found in strips. Usually, when I find ceiling tin, it is in 24 x 24 squares. Those squares work much better for my home projects than these strips.
A Base
It was a crazy coincidence that I got some large cabinet knobs on a recent pick. When I saw this project, it clicked in my mind that I had all the supplies I needed to give it a shot!
If you don’t have large knobs, regular ones work fine! You could also use a flower frog, some wooden blocks, or a wooden spool as your tree base.
Tin Snips
Something to remember when you are cutting tin with tin snips when you are close to an edge it is hard for the tin snips to work. Make sure that you leave a little bit of space so there is room for the clippers to work!
Sometimes it might feel like the tin snips aren’t working too well. When you are cutting metal and get into tight areas, it can be difficult to cut. However, you can take something else that is metal such as a piece of wire, and use a sawing motion and it will eventually cut. That is something to try if the tin snips are proving to be difficult.
Gloves
When working with tin, you should probably use some gloves. This ceiling tin is sharp, and I have cut myself in the past. No worries, I do have my tetanus shot! I just don’t wear gloves, because I prefer to work with my bare hands.
The Process
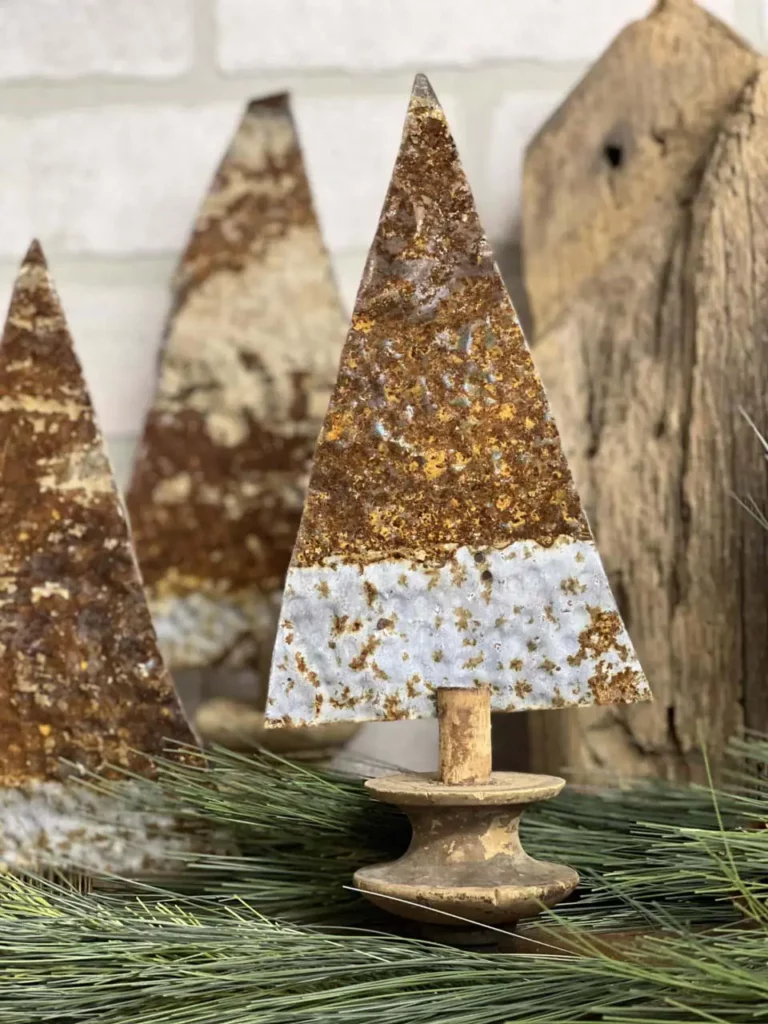
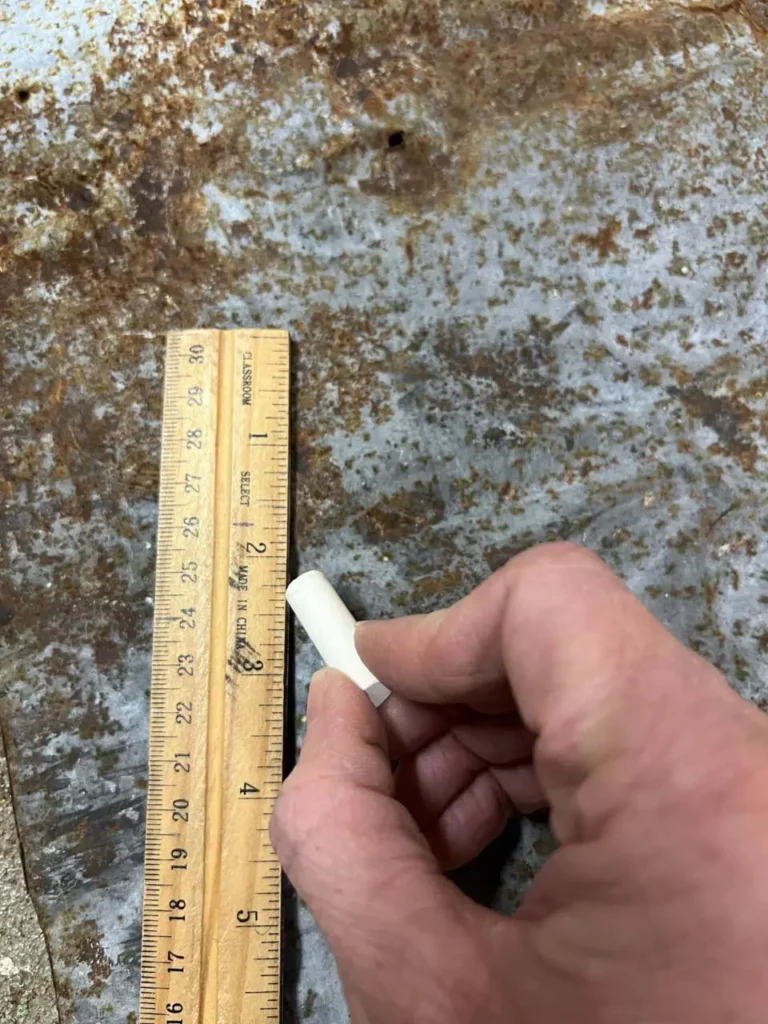
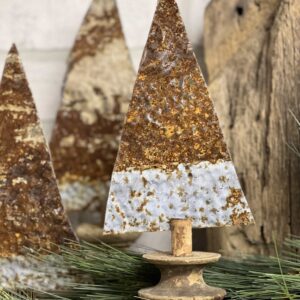
To get started, I took my chalk and ruler and created a sloped line on the ceiling tin. Then I set down my base at the bottom I measured from my first line to the base. Then I used that measurement to determine where I should start my other line on the opposite side of the base. After I made my lines (you should have a triangle shape at this point) I got my tin snips and started cutting.
Clear Coat
As you cut, paint chips might pop off. I like a chippy look so it doesn’t bother me. To avoid more paint chips falling off when the project is finished, I will give it a clear coat. You could spray your tin before you start your project, but there is the chance that paint chips could still work off as you manipulate the tin to cut it. You would probably end up having to do a second application of clear coat after your project is done.
If you really want to make sure that the paint (it’s probably lead) and rust will stay in place, you can brush it on. If you don’t have any kids in your house that put everything in their mouths, it is probably fine. It just depends on your lifestyle and preference.
Prepping the Base
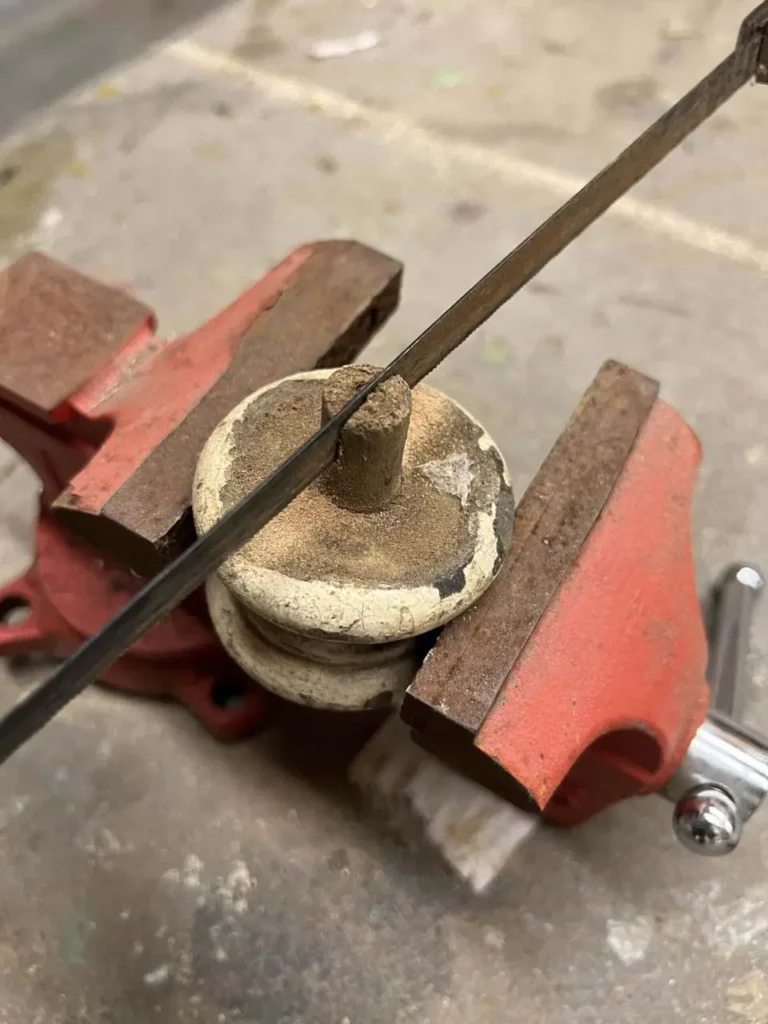
With my knobs, I made little slits on the top with a hand saw. I put the bottoms in a clamp and then sawed. Then I put the tree I cut out into the slit.
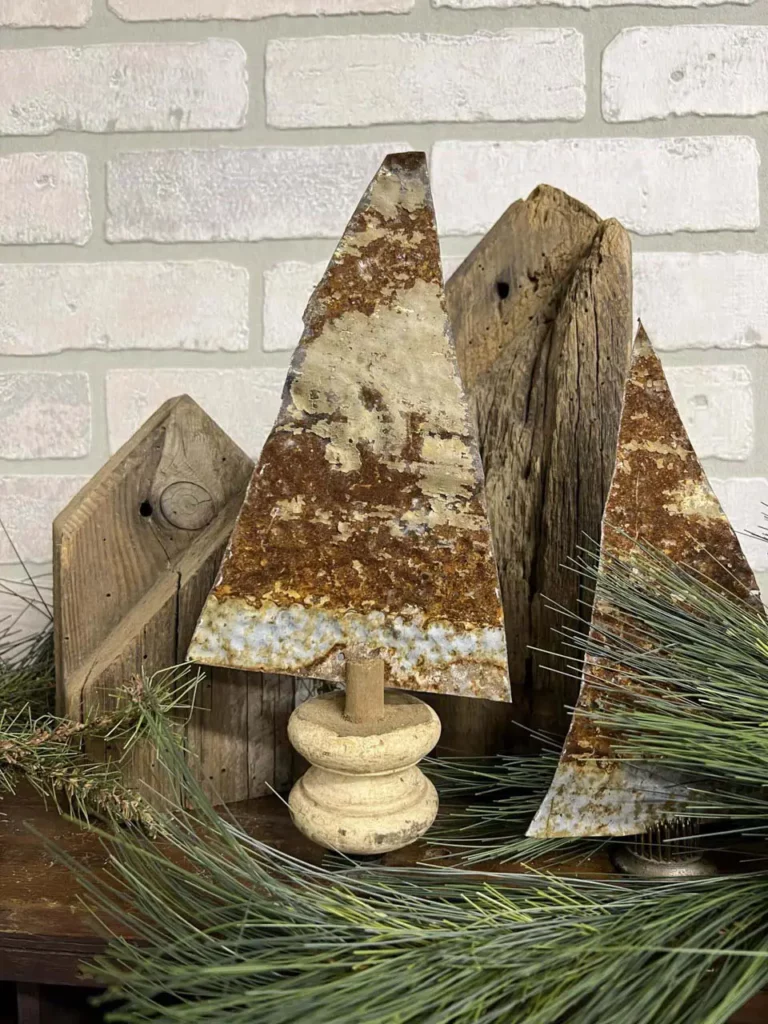
Since I was using a knob, it is rounded on the bottom and the tree is a little top-heavy from the tin. A trick here is to use some sticky tack on the bottom of the knob to hold it down in place!
Tip: To hold down smaller decor items that have difficulty staying up, use a wad of sticky tack on the bottom.
I also experimented with creating a little cup to hold the tree with a knob base in place. If you use a base with a flat bottom, you will avoid this problem altogether. It just depends on what you have available and the look that you want.
Embellishment
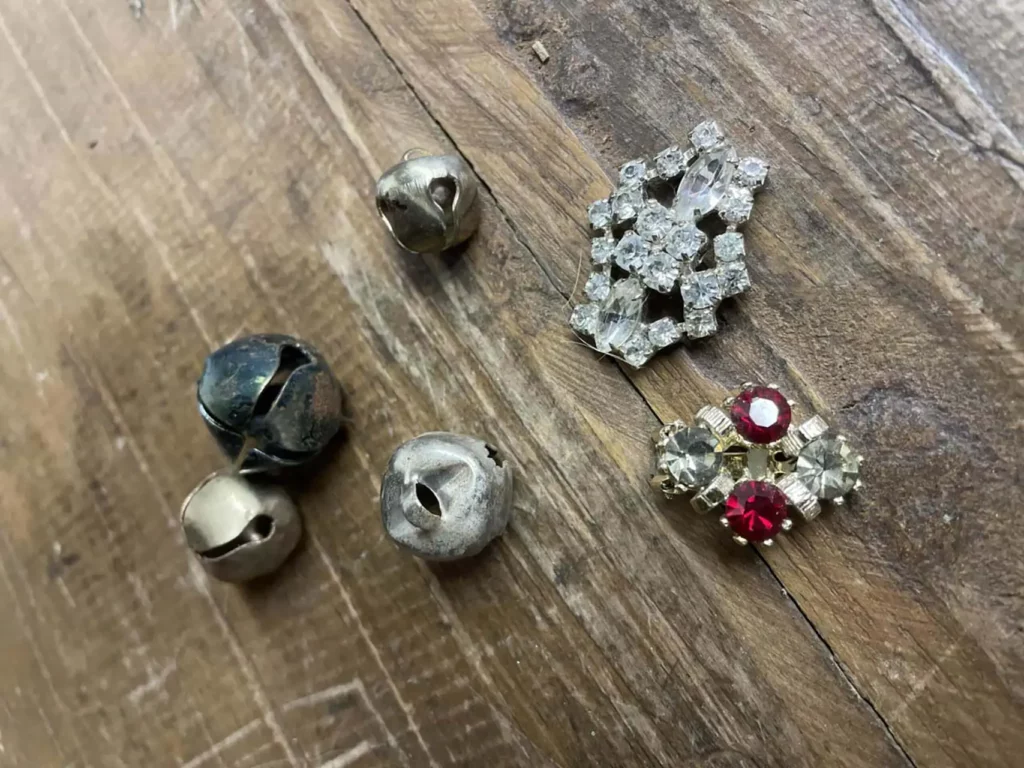
You can put whatever you want on the top to jazz up your tree. Maybe a bead, a bell, an ornament, a star, a piece of vintage jewelry. Plain Jane is cute too!
I would recommend that you make at least three trees so you have a little forest. Remember, odd numbers and a variety of heights look best to the eye when you are creating vignettes!
DIY Ceiling Tin Tree
Materials
- Old ceiling tin
- A base (old knob, flower frog, blocks, wooden spool, etc.)
- Tin snips
- Gloves
- Chalk
- Ruler
Instructions
- Using chalk and a ruler, trace out the shape of your tree on the ceiling tin.
- Cut out your tree with tin snips.
- Select a base for your tree (wooden knob, wood spool, blocks, flower frog, etc.).
- If your base is wood, cut a slit that the tin tree can sit in using a hand saw.
- Place your tree onto your base & display!
Video
Want more of my 25 Days of Christmas tutorials? Browse my blog! This Jar Lid Snowman tutorial from last year is super cute. Or, make another tree with me! I have a Simple DIY Christmas Decoration with Vintage Light Bulbs tutorial from this year.
If you love my ceiling tin projects, check out my How To Make a Ceiling Tin Scrap Heart for Valentine’s Day.
Are you an Antique Dealer too? Read about my 10 Tips for your Antique Booth.
Don’t forget that I do live sales every Sunday at 7 PM and every Tuesday at noon on my Facebook page! I also have tons of video tutorials there as well!
Check Out my Latest YouTube Video Here:
This post may contain affiliate links for the products I use and recommend. I am not paid to promote these products. If you purchase using my affiliate links, I could make a small commission at no charge to you.