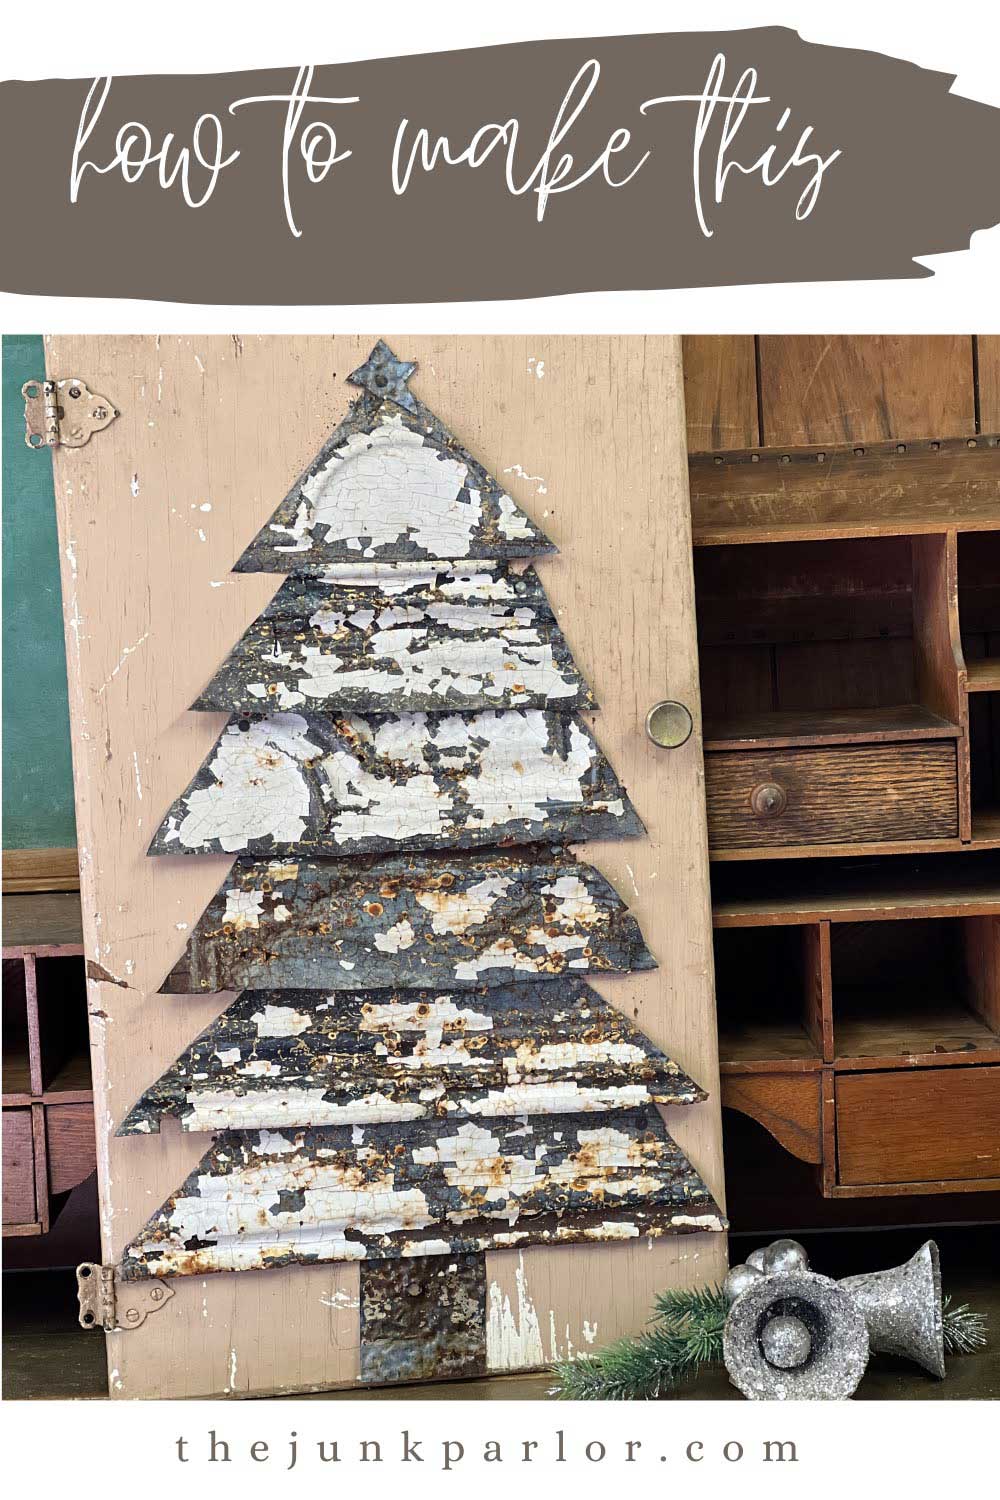
Do you love rusty chippy paint? Then, you’re going to love this ceiling tin Christmas tree mounted to an old door!
This 25 Days of DIY project is one for everyone who loves what I like to call rusty crusty treasures! This tree made out of old ceiling tin will make the perfect addition to your holiday decor! To make this along with me, watch me on a Facebook LIVE!
To create this ceiling tin tree you will need:
- Old Tin Ceiling Tile
- Tin Snips
- Nails
- Hammer
- Wood Surface to attach your tree to!
The Process
As I mentioned, this project uses old ceiling tin! A lot of times, it comes in 24 x 24 inch squares. I bought tons at an auction years ago that came in long sheets. I cut them to the size of the acoustic tile for the drop ceiling in the entry way of my old shop. It was the perfect rustic touch to my little brick church in town.
What do you think? Do you love it too?
I still have some left over from that project and am always on the lookout for more. For this project I am going to use a chippy slightly damaged piece. I would feel terrible cutting up a good piece that someone could use for decor. I love the square ceiling tins when someone puts a wreath on it!
To cut up my piece of ceiling tin, I needed some tin snips. This required me taking a quick drive up the road to my dad’s house to grab his! Well . . . I actually think they were mine that I ended up giving to him. Funny how these things happen!
Once I had my tin snips, I cut the ceiling tin into trapezoid shaped strips. Each strip was slightly smaller than the next to create the tree shape. To do this you could create some templates if you want, but I just eyeballed it!
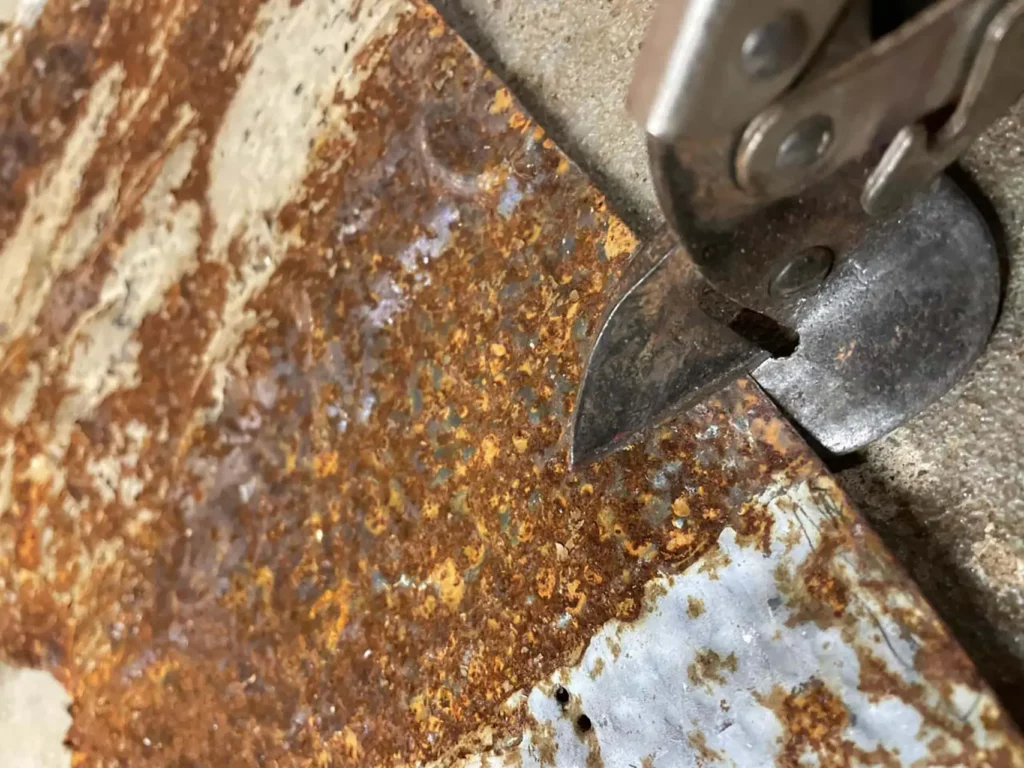
Next, I cut a triangle for the top of the tree and a rectangle for the trunk of the tree. If you don’t want a trunk you could skip this step! I also cut out a little star for the top. This, of course, is also optional. You could always repurpose something such as an old candy mold for a star!
Once I had everything cut out, it was time to shop my stash for something to attach my tree to. I ended up deciding to use an old cabinet door I had. An old board would also work! This is yet another project where depending on the size of the tree you create, you could attach it to so many different things to suit your tastes. If you didn’t have wood to nail the ceiling tin to, you could always find something else that you can glue your pieces to! A cutting board, cookie sheet, salvaged board, or suitcase come to mind as options!
If you don’t want to use a hammer and nails, you would be perfectly fine to use either E6000 glue or your hot glue gun.
Let’s Put it Together!
Would you rather watch than read? Tap here to Watch a short 3 minute video! It was one of my most popular reels this year!
Next you will want to lay out your pieces on whatever you are going to be attaching it to. This will allow you to make sure that it fits and determine your spacing, or how much overlap you want on each piece.
Now it is time to attach the ceiling tin tree to the door. I used a hammer and small upholstery nails. Since I was using a cabinet door that wasn’t very thick, I knew that the upholstery nails wouldn’t poke through the back of the door because they are so short. I even considered using some upholstery nails I had that had big brass heads. They would have looked a little like ornaments!
You can really use any nails that you have. Take into consideration the nail head color and size. Do you want it to blend in or stand out? That will influence what nails you use. You also need to pay attention to nail length. That is one of the main reasons I used the nails I did, they were short!
I ended up choosing some upholstery nails that were a little more discreet. I figured that would work the best for my project since I wanted the layers of my tree to overlap ever so slightly. Basically, just enough to keep you from seeing the cabinet door between layers. I decided this because that tall shaped tree seemed to fit the cabinet door the best.
Once I decided on how I was going to attach my ceiling tin, I picked up my hammer and got to work!
As I pounded the nails in, I noticed that paint chips were coming off. If you have toddlers at home that put everything in their mouth, then you will want to keep this project away from them! After you finish your project, it would be a good idea to either brush or spray it with a clear coat to keep any more paint chips from coming off!
Sealing over white paint can be a little tricky. Read about my tips HERE.
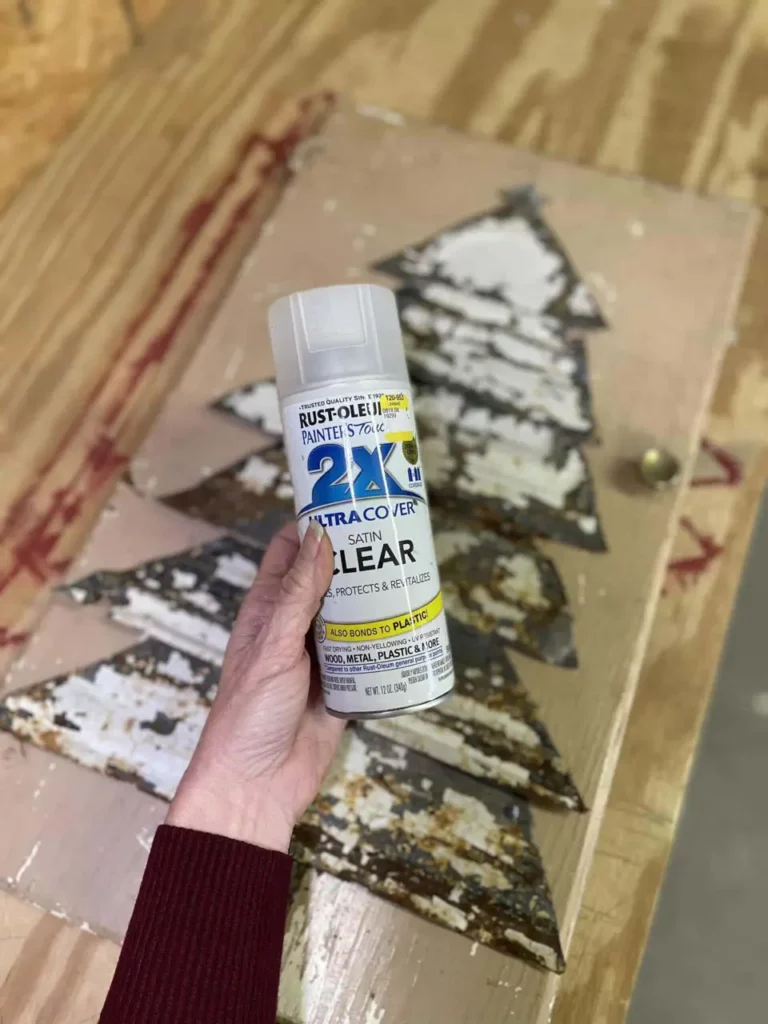
I am okay with the paint chipping off because I like the color underneath, but if you like the paint, you probably want to polyurethane first.
Tip! Polyurethane is a great way to keep chippy paint from falling off. It preserves that awesome chippy look that we all love!
I love how my tree looks with just a star, but you could add different things to your tree as ornaments using hot glue if you want! Or swag some bead garland across to bedazzle your tree, or even add fairy lights. You can make your tree as simple or fancy as you like!
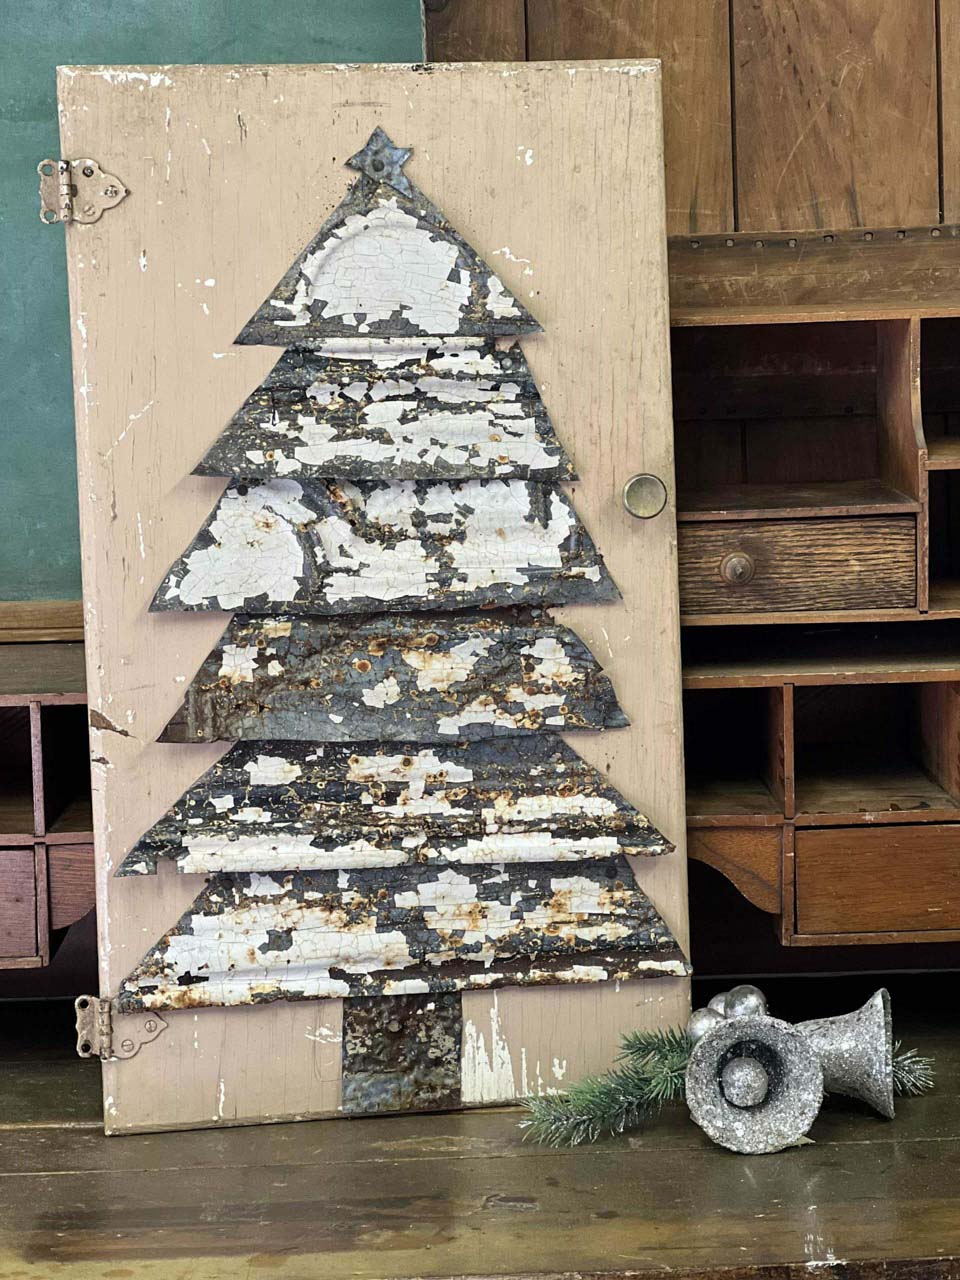
If you like this tree tutorial, check out this Simple Christmas Tree Bucket for Your Home or my tips for Decorating Around the Tree!
Be sure to stay tuned into my 25 Days of Christmas DIYs, I have another tin tree project coming up soon! I am going live on my Facebook page everyday until Christmas with a new project.
Do you have some ceiling tin scraps? Use them up with this project!
Did you know that I also do Facebook live sales every Sunday at 7 and Tuesdays at Noon? Learn all about how to participate in my live sales!
This post may contain affiliate links for the products I use and recommend. I am not paid to promote these products. If you purchase using my affiliate links, I could make a small commission at no charge to you.
Don’t Forget to Pin It!
